
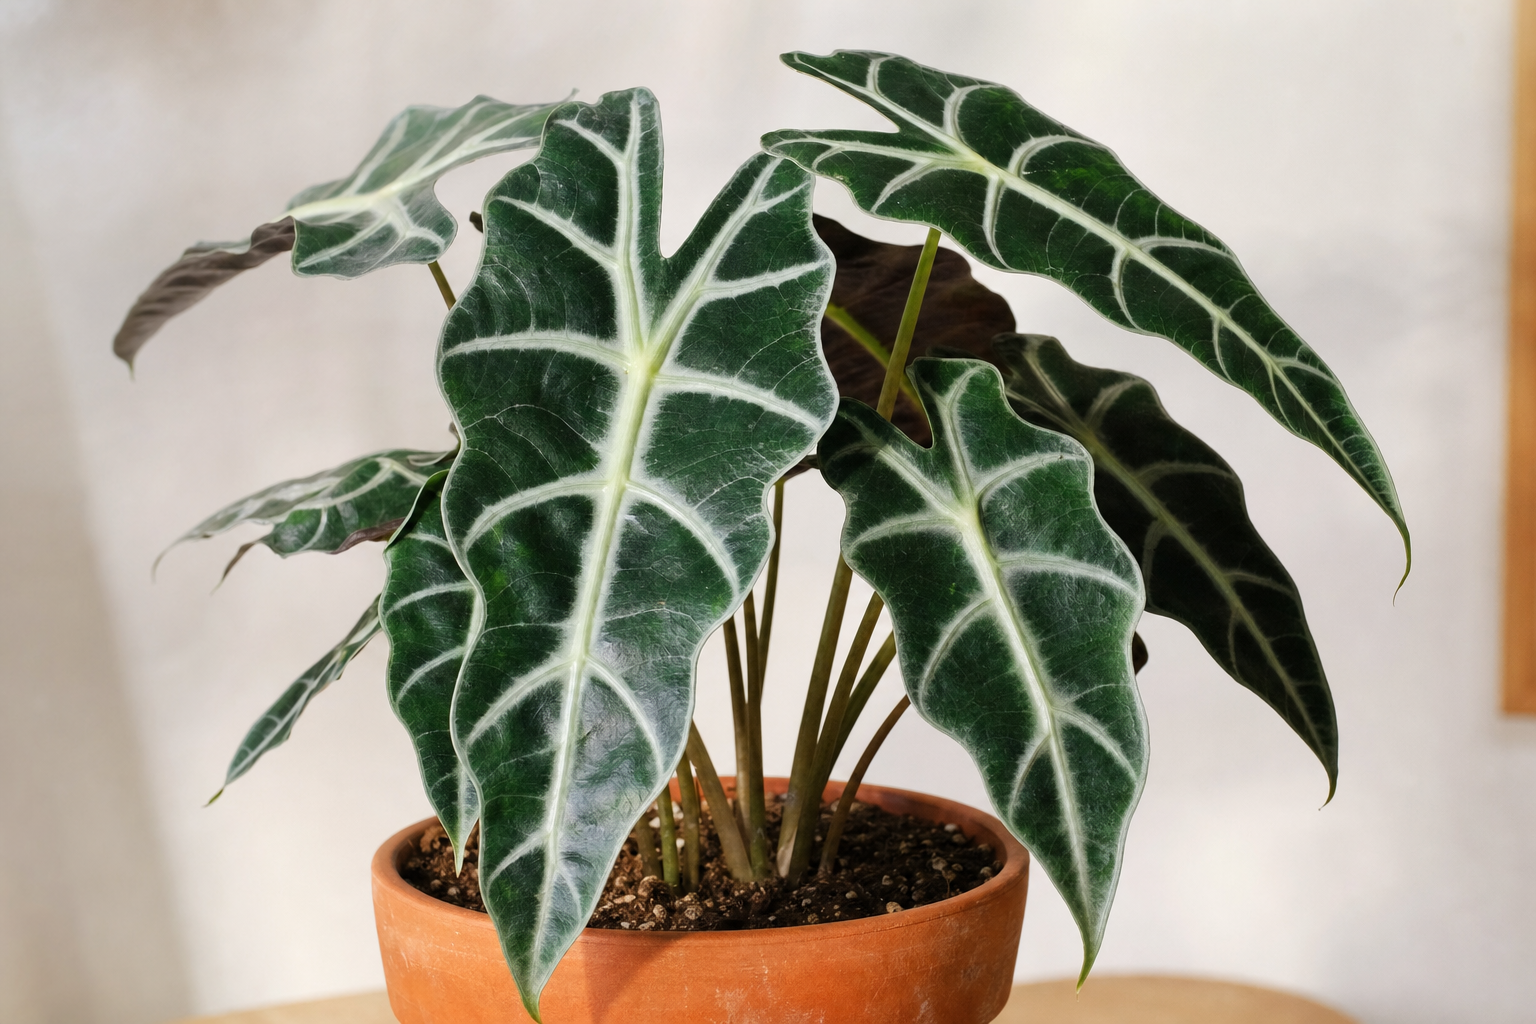
Alocasia Polly
Alocasia amazonica "Polly"
Also known as: African Mask Plant, Arrowhead Plant, Elephant Ear Polly, Kris Plant
Bright indirect light
When top 1-2 inches of soil are dry
50–70%
65–85°F (18–30°C)
Well-draining potting mix with perlite and peat moss
Balanced liquid NPK 20-20-20, every 2 weeks in spring/summer
Intermediate
Toxic to pets
Toxic to Pets
Contains insoluble calcium oxalate crystals. If chewed or ingested, these needle-like crystals cause intense burning, swelling of lips and tongue, excessive drooling, vomiting, and difficulty swallowing. Keep away from curious cats, dogs, and small children. Wash hands after handling.
Source: ASPCA Toxic Plant List
Seasonal Care Calendar
| Season | Watering | Fertilizer | Notes |
|---|---|---|---|
| Spring | Every 7–10 days | Start bi-weekly feeding | Begin repotting if needed. Resume regular watering. This is the best time for propagation through division. |
| Summer | Every 7–10 days | Bi-weekly feeding | Active growth period. Monitor closely for pests like spider mites. Keep soil consistently moist. Consider moving to outdoor shaded area. |
| Fall | Every 10–14 days | Reduce to monthly | Growth slows. Reduce watering frequency gradually. Stop fertilizing by late fall. Watch for early signs of dormancy. |
| Winter | Every 14–21 days | None | Dormant period. May drop leaves — do not discard the plant! Keep soil barely moist. Keep away from cold drafts and heating vents. Consider using grow light. |
Detailed Care Guide
Everything you need to know to keep your Alocasia Polly thriving.
Light Requirements
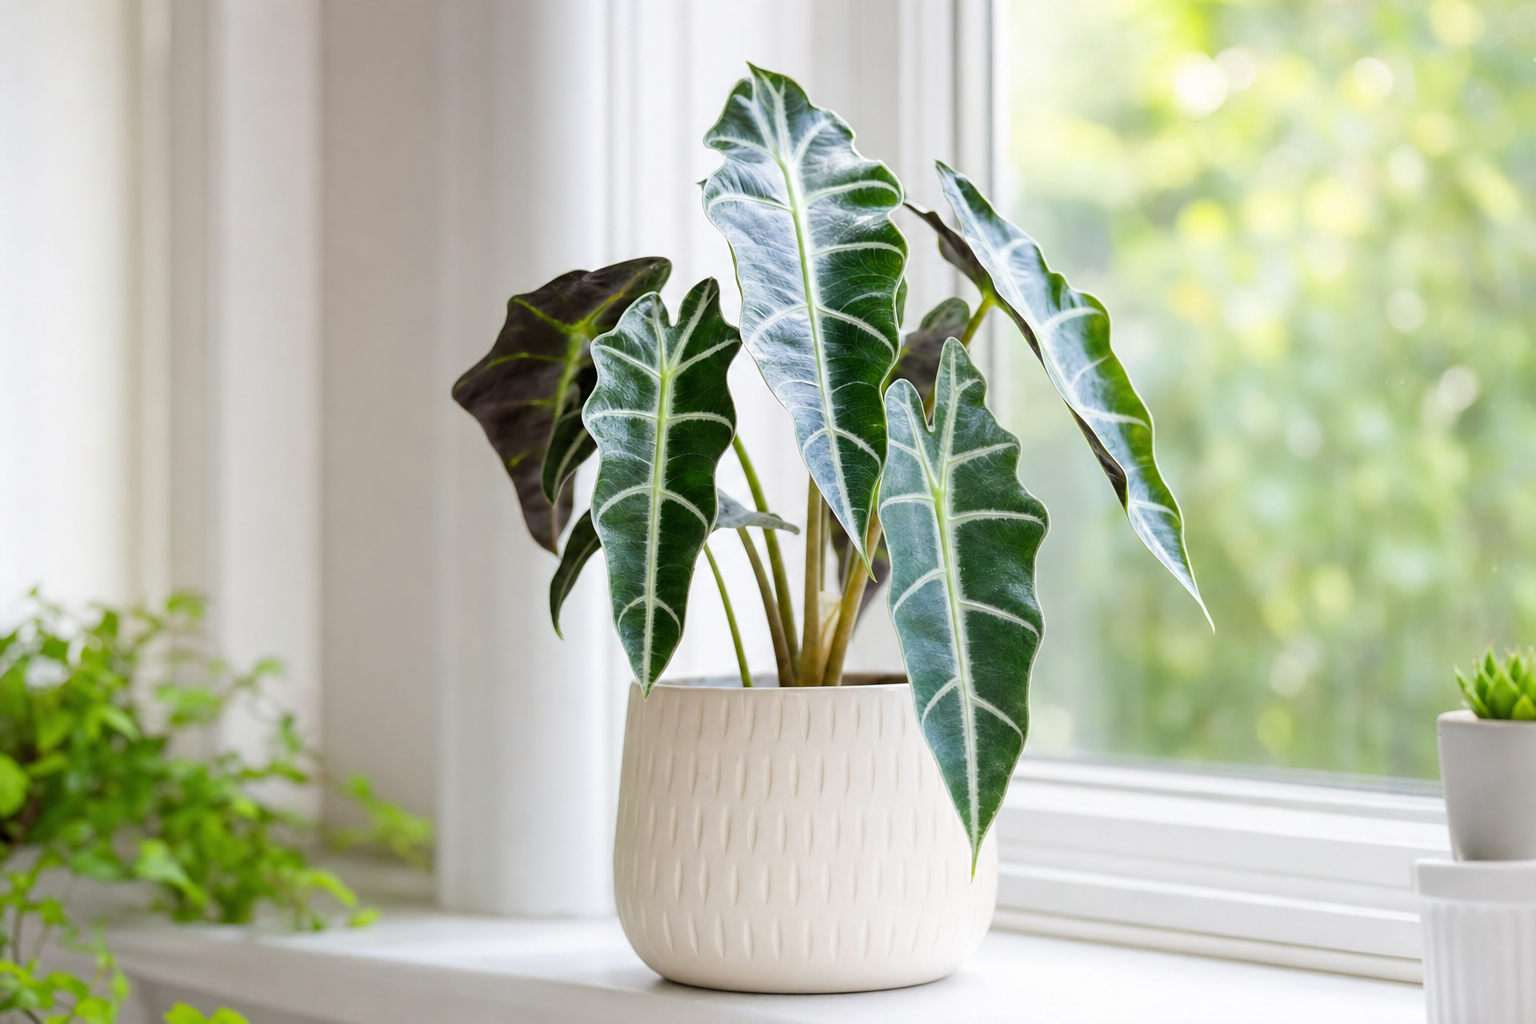
Alocasia Polly thrives in bright, indirect light — the kind of filtered sunlight found near an east- or north-facing window, or several feet back from a south- or west-facing window. In its native Southeast Asian rainforests, it grows beneath the forest canopy where light is dappled and filtered, so it has evolved to love brightness without direct sun exposure.
Direct afternoon sunlight will scorch the leaves, causing bleached patches, brown crispy edges, and faded coloration. The signature dark green leaves with bold white veining will lose their dramatic contrast in harsh light. On the other hand, too little light causes the plant to become "leggy" — stems elongate seeking light, leaves grow smaller, and the plant loses its compact, lush appearance.
A spot near an east-facing window is ideal. North-facing windows work well too, though growth may be slower in winter. If your only option is a low-light space, supplement with a grow light for 10–12 hours daily. Rotate the pot a quarter turn each week to ensure even growth on all sides — Alocasia Polly naturally grows toward light and can become lopsided without rotation.
Watering
Watering Alocasia Polly is a delicate balance — the plant loves consistent moisture but absolutely cannot tolerate soggy soil. The golden rule: water when the top 1–2 inches of soil feel dry to the touch. This typically means watering once or twice a week during the growing season (spring and summer), and less frequently — perhaps every 10–14 days — during fall and winter when growth naturally slows.
When you water, do so thoroughly until water flows freely from the drainage holes, then discard any water that collects in the saucer after 15 minutes. Never let the pot sit in standing water — this is the fastest way to cause root rot, which is the #1 killer of Alocasia Polly. Use room-temperature water; cold water shocks the roots and can cause leaf drop.
Signs of overwatering: yellowing leaves (especially lower ones), soft mushy stems at the base, soil that stays wet for more than a week, and a sour or musty smell from the pot. Signs of underwatering: drooping leaves that perk up after watering, dry crispy leaf edges, and soil pulling away from the pot edges.
One unique Alocasia Polly behavior to note: this plant is prone to going dormant. If stressed by cold, low light, or drought, it may drop all its leaves and appear to die — but the tuberous roots survive. If this happens, reduce watering, keep the soil barely moist, and wait for spring when new growth should emerge.
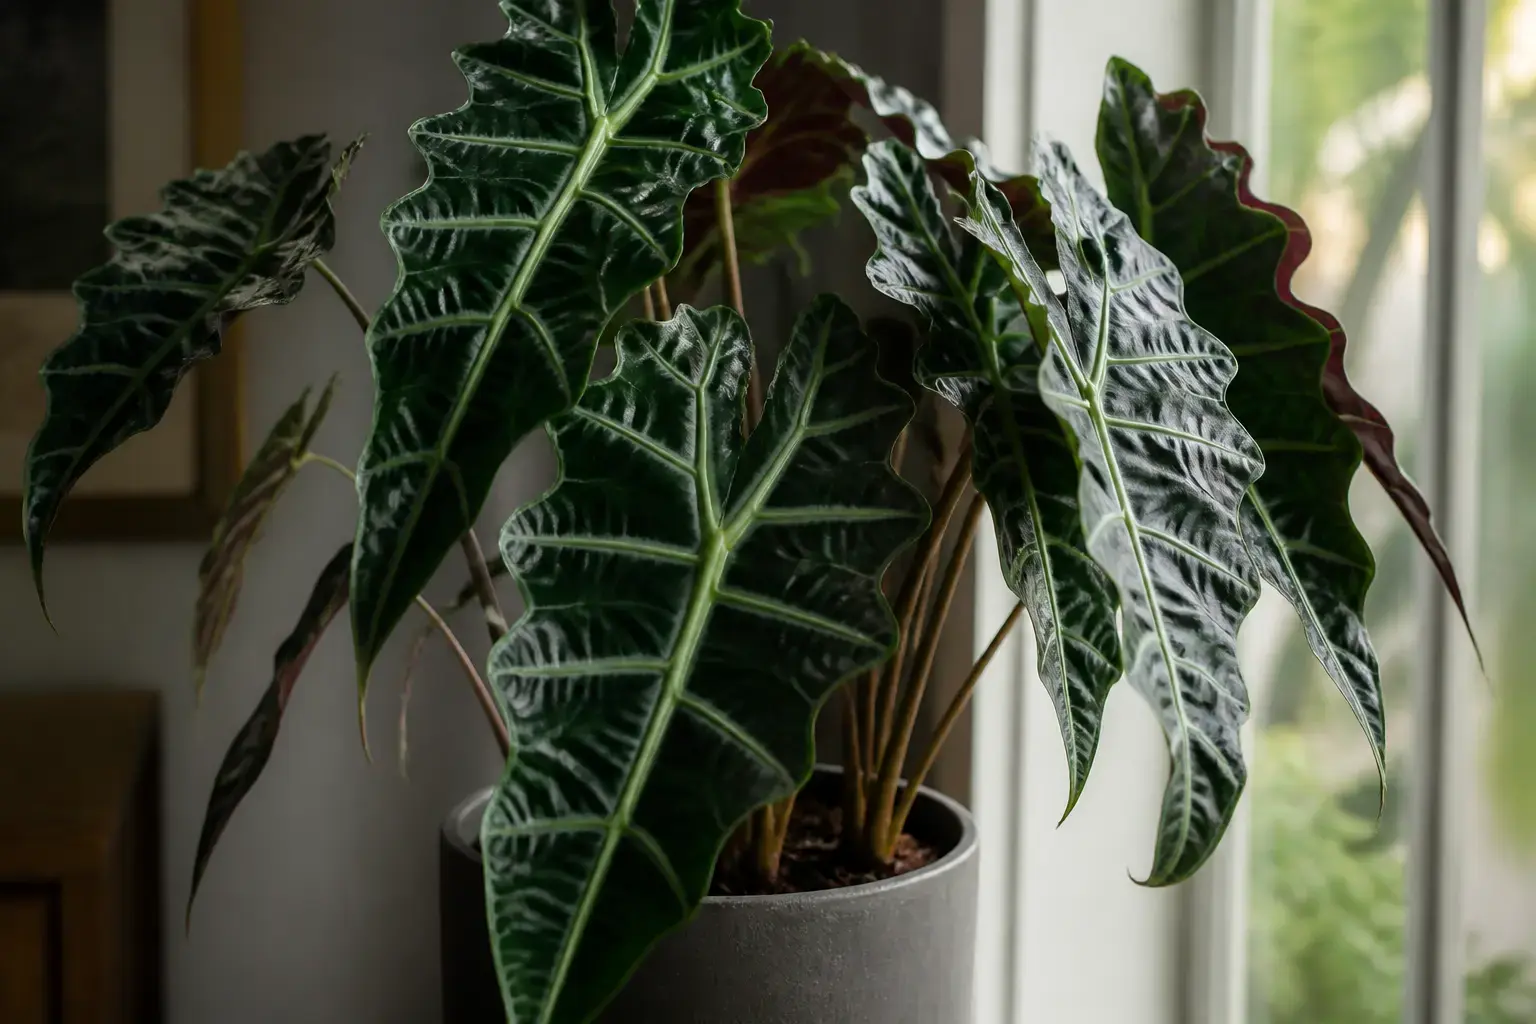
Humidity
As a tropical rainforest native, Alocasia Polly demands humidity between 50–70% to truly thrive. Average home humidity (30–50%) is often insufficient, especially during winter when forced-air heating dries the air dramatically. Without adequate humidity, you'll notice brown, crispy leaf tips and edges — the plant's way of signaling its displeasure with dry air.
The most effective way to boost humidity is a small humidifier placed within 3–4 feet of the plant. Set it to maintain 50–60% humidity, and your Alocasia will reward you with lush, healthy growth. A pebble tray filled with water beneath the pot (ensuring the pot sits on the pebbles, not in the water) provides a gentle, passive humidity boost. Grouping your Alocasia with other tropical plants also creates a shared microclimate with naturally higher ambient humidity.
Misting is controversial — while it provides a temporary boost, the water evaporates within minutes and doesn't meaningfully raise long-term humidity. More concerning, wet leaves overnight can promote fungal and bacterial leaf spots. If you mist, do so in the morning so leaves dry before evening. The bathroom is an ideal location for Alocasia Polly thanks to naturally higher humidity from showers.
Temperature
Alocasia Polly prefers temperatures between 65–85°F (18–30°C), which aligns well with typical indoor conditions. This plant has no cold tolerance whatsoever — temperatures below 55°F (13°C) cause severe stress, and prolonged exposure to cold can be fatal or trigger dormancy. Keep your Alocasia away from cold drafts, air conditioning vents, exterior doors that open frequently in winter, and unheated rooms.
Avoid placing your Alocasia near heat sources like radiators, heating vents, or fireplaces either — sudden temperature swings stress the plant and can cause leaf drop. The ideal environment is warm, stable, and away from both cold and hot drafts. A spot in a warm bathroom (often the most humid room in the house) or a consistently warm living room works beautifully.
If you move your Alocasia outdoors for summer, bring it back inside when nighttime temperatures consistently drop below 60°F. In USDA zones 10–11, Alocasia can be grown outdoors year-round, but it may become invasive — check local guidelines before planting in the ground.
Soil
Alocasia Polly needs well-draining soil that retains some moisture without becoming waterlogged. A standard potting mix alone is too dense and holds too much water, leading quickly to root rot. The ideal mix mimics the loose, organic debris found on a rainforest floor.
Recommended mix: 1 part quality potting soil + 1 part perlite + 1 part peat moss or coco coir. The peat or coco coir provides moisture retention and slight acidity, while perlite ensures excellent drainage and aeration. For an even chunkier mix, add a handful of horticultural charcoal to help prevent root rot and a small amount of orchid bark for extra aeration.
For a simpler approach, mixing 2 parts potting soil with 1 part perlite works well for most home growers. The pH should be slightly acidic to neutral (5.5–6.5). Never use garden soil or topsoil in pots — they compact over time, suffocating roots. Always use a pot with drainage holes — there are absolutely no exceptions for Alocasia.
Fertilizer
Feed your Alocasia Polly with a balanced liquid fertilizer (NPK 20-20-20) diluted to half strength, applied every two weeks during the spring and summer growing season. Alocasia are moderate feeders — they need nutrients to support their dramatic leaf growth, but over-fertilizing causes salt buildup that burns leaf tips and edges, appearing as ugly brown crispy margins.
If you prefer organic options, worm castings top-dressed on the soil surface in spring, or a diluted fish emulsion every 4–6 weeks during the growing season, works well. Slow-release granular fertilizer (like Osmocote) mixed into the soil at the start of spring provides a steady nutrient supply for 3–4 months.
Stop fertilizing entirely from late fall through winter when the plant enters its dormant period and growth naturally slows. If you notice white crust on the soil surface or around the drainage holes, that's accumulated mineral salts — flush the soil thoroughly with water next time you water to leach out the excess. Yellowing leaves with green veins can indicate iron deficiency, which can be corrected with a chelated iron supplement.
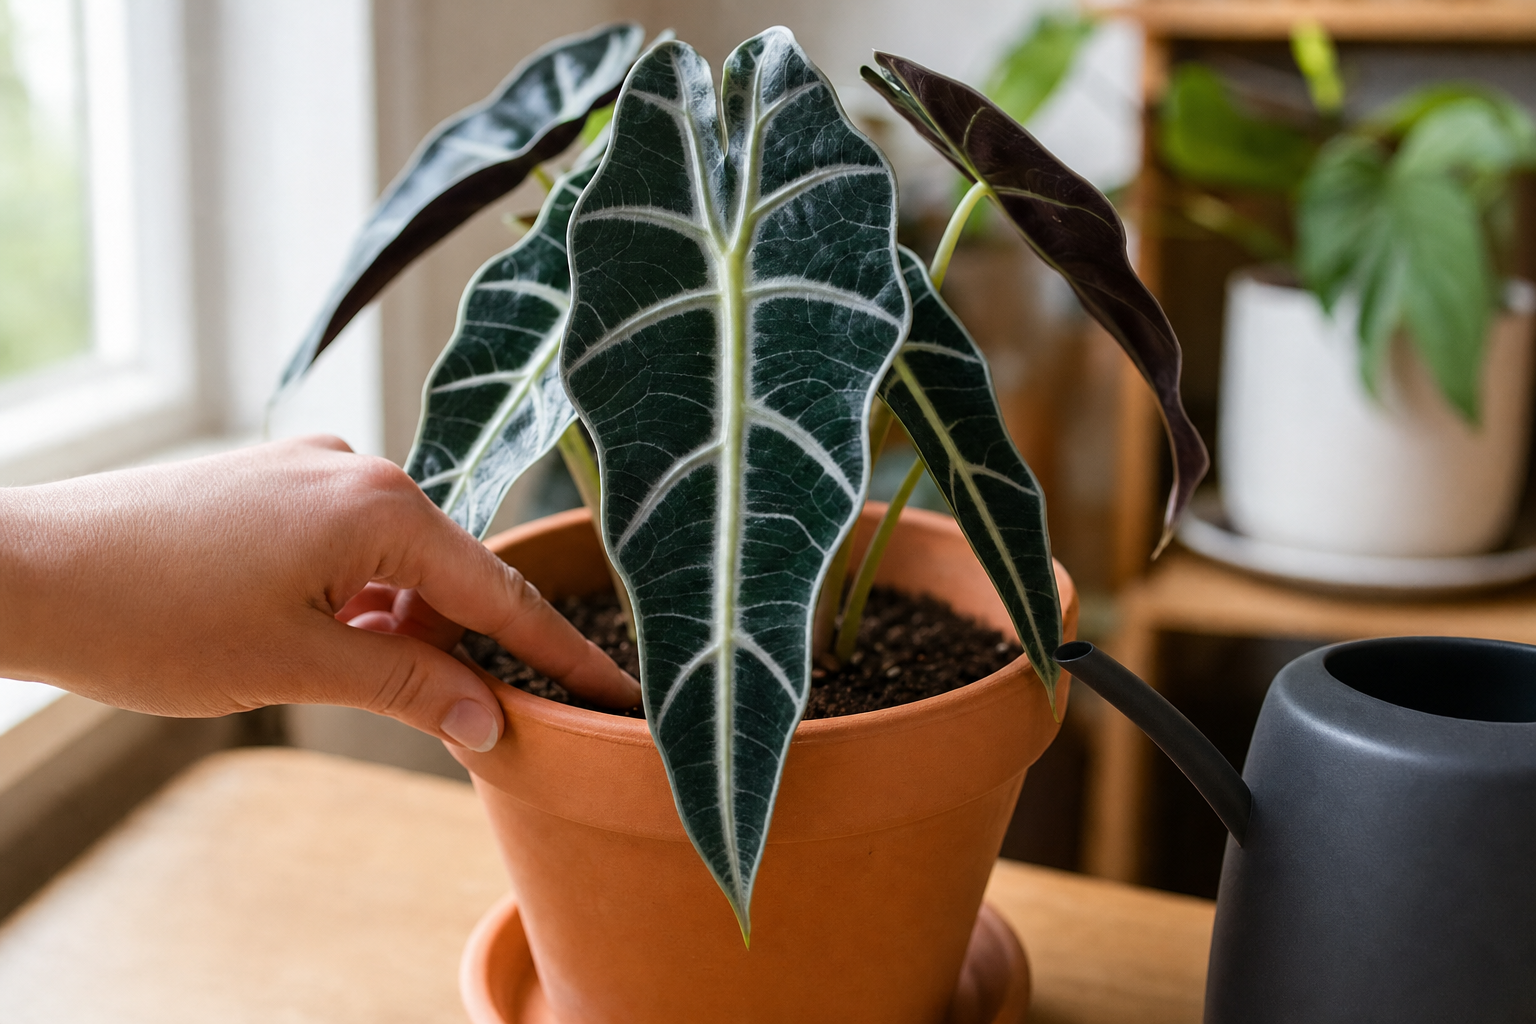
Repotting
Repot your Alocasia Polly every 1–2 years, or when you see roots circling the bottom of the pot or growing out of the drainage holes. The best time to repot is in spring or early summer when the plant is actively growing and can recover quickly from root disturbance.
Choose a pot only 1–2 inches larger in diameter than the current one. Going too large means excess soil stays wet too long, dramatically increasing the risk of root rot. Always use a pot with drainage holes.
To repot: water the plant a day before to make removing the root ball easier. Gently slide it out — you may see small tuber-like structures on the roots, which are completely normal (Alocasia stores energy in these). Loosen circling roots with your fingers and trim any black, brown, or mushy roots with sterilized scissors. Place fresh potting mix in the new pot, position the plant at the same depth it was growing before, and fill in around the sides. Water thoroughly and keep the plant in a slightly shadier spot for about a week to reduce transplant shock before returning it to its usual location.
Our Experience
My Alocasia Polly went completely dormant last winter — dropped every single leaf and I thought I killed it. I kept watering sparingly and then, sure enough, three new corms sprouted in March! Now I understand that dormancy is just part of their lifecycle, not a death sentence. I keep a grow light on it through winter to minimize dormancy.
— Grown indoors in USDA Zone 7a, south-facing window, first winter with grow light
I learned the hard way that Alocasia is NOT a "set it and forget it" plant. The humidity in my apartment dropped to 30% in winter, and within a week the leaf tips went brown and crispy. A small humidifier fixed it immediately — now I keep it running year-round. The difference in leaf quality is night and day.
— Indoor collection in dry climate apartment, humidifier used continuously
When I first got my Alocasia Polly, I watered it like my pothos — once a week no matter what. Bad mistake. The soil stayed too wet and the lower leaves turned yellow and mushy. I let it dry out much more (top 2 inches dry) and repotted into a chunkier mix with more perlite. Now it's thriving. The lesson: treat Alocasia more carefully than other tropicals.
— Indoor plant collection, learned through overwatering mistake
 Amazonica
 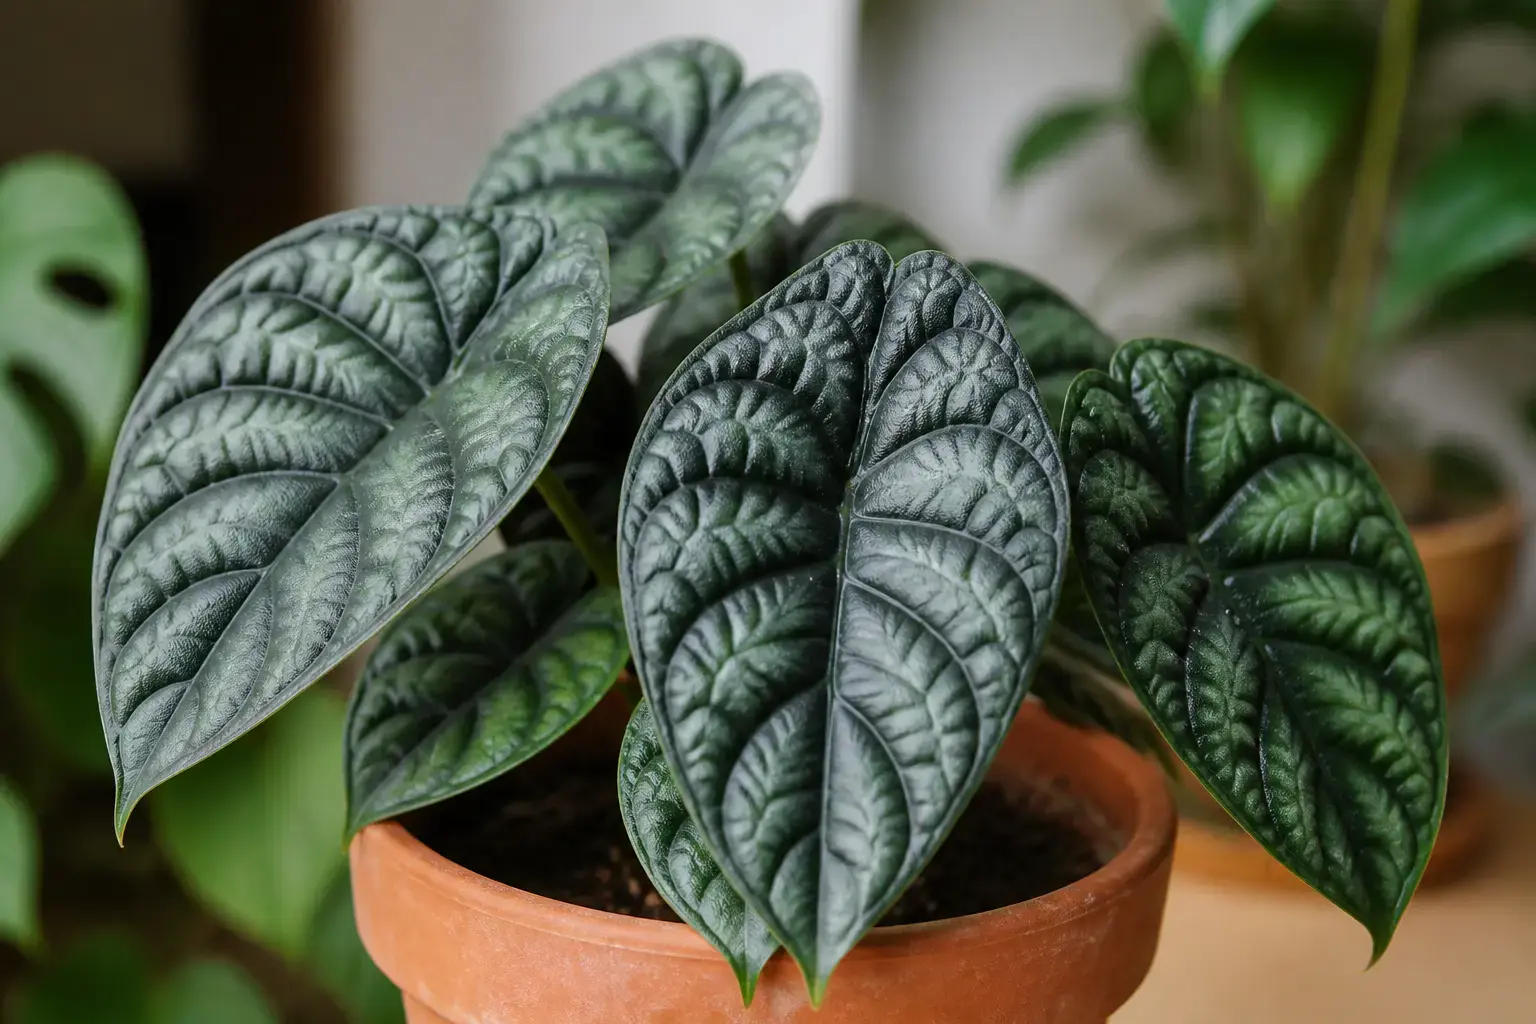 Dragon Scale
 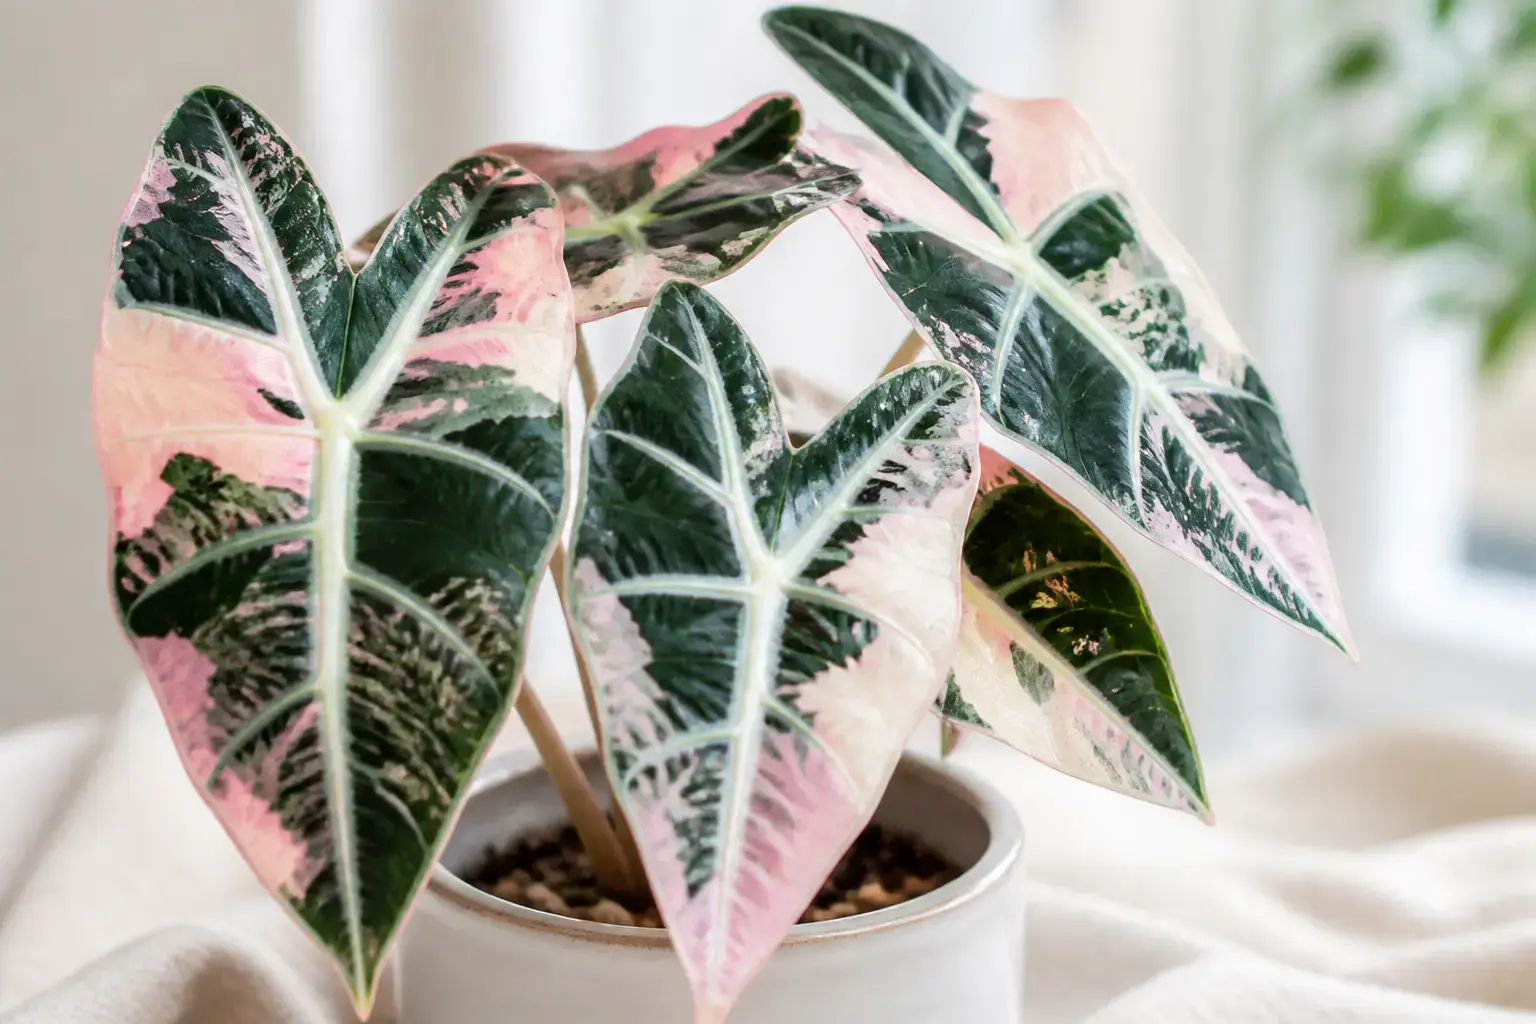 Variegata
 Compare Varieties
Explore different cultivars side-by-side and find the best match for your space.
Browse all varieties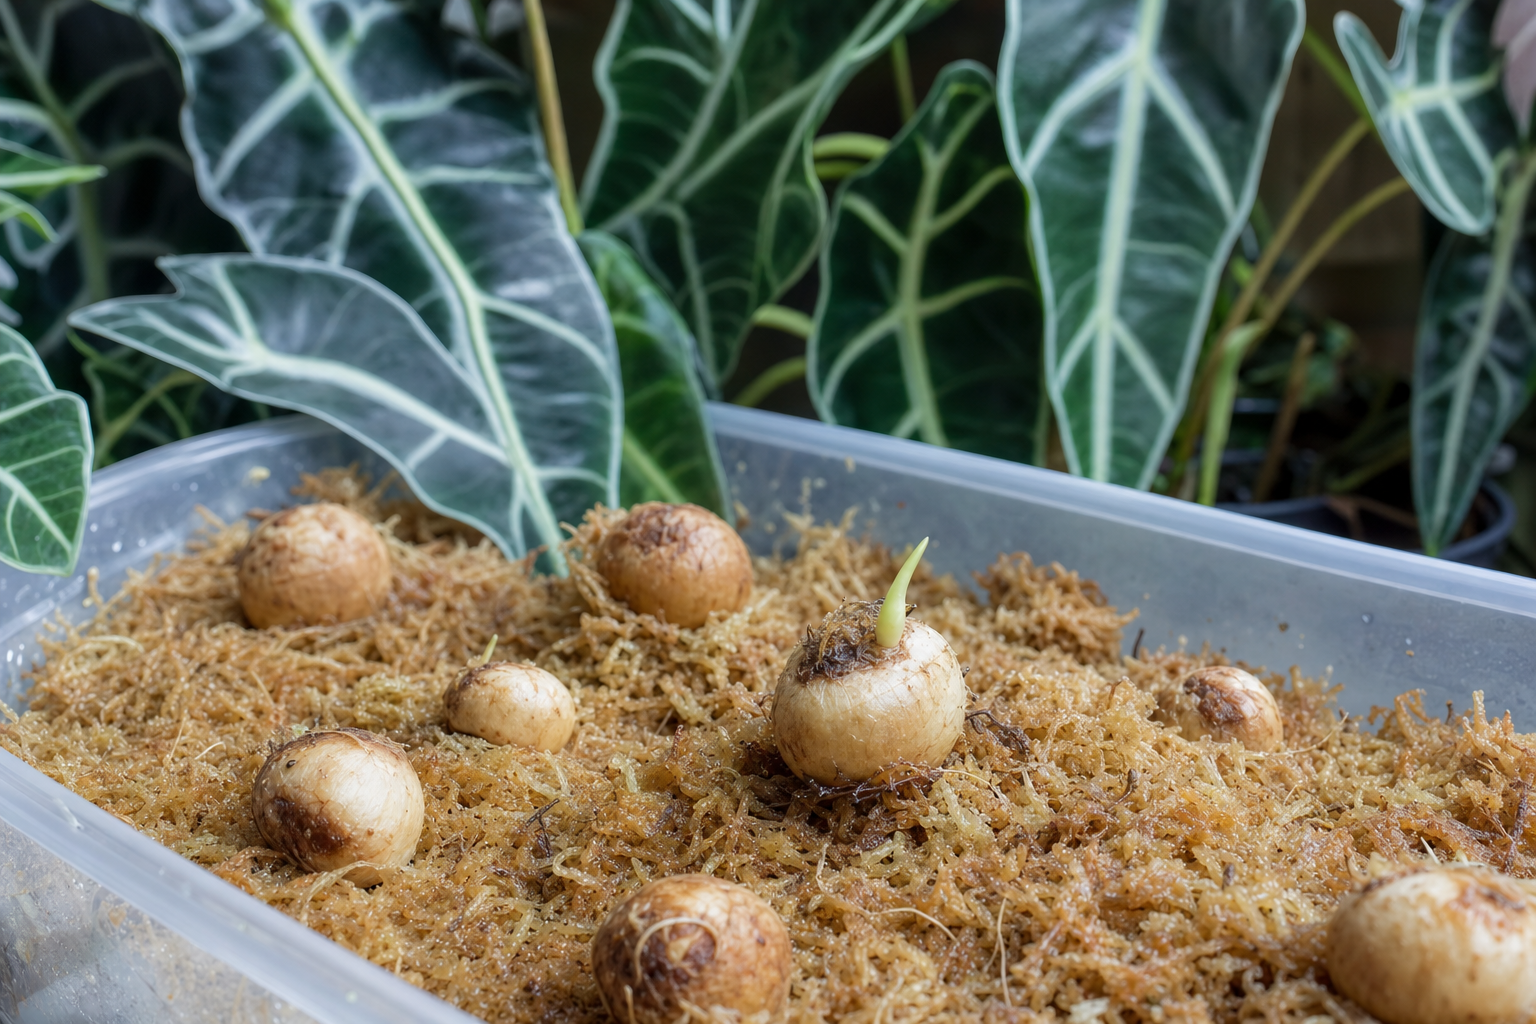
Propagation Guide
Step-by-step instructions for multiplying your plant collection.
Learn how to propagateFrequently Asked Questions
How often should I water my Alocasia Polly?
Why are my Alocasia Polly leaves turning yellow?
How much light does Alocasia Polly need?
Is Alocasia Polly toxic to cats and dogs?
How do I increase humidity for my Alocasia Polly?
Why is my Alocasia Polly dropping all its leaves?
Can Alocasia Polly grow in low light?
What is the best soil for Alocasia Polly?
Common Problems
Why Are My Plant Leaves Turning Yellow?
Yellowing leaves are one of the most common houseplant problems. The good news is that most causes are easy to identify and fix once you know what to look for.
Read diagnosis guideHow to Fix an Overwatered Plant
Overwatering kills more houseplants than any other cause. The tricky part? The symptoms — yellowing, wilting, drooping — look just like underwatering. Here's how to tell the difference and fix it.
Read diagnosis guideReferences
- [1] Royal Horticultural Society. Alocasia amazonica
- [2] ASPCA. Alocasia Toxicity
- [3] The Spruce. How to Grow & Care for Alocasia Polly
- [4] International Aroid Society. Alocasia amazonica
Similar Plants

Monstera Deliciosa
Monstera deliciosa

Philodendron
Philodendron hederaceum

Calathea
Calathea ornata