
How to Propagate Alocasia Polly
Alocasia Polly is one of the easiest houseplants to propagate. Here are three reliable methods — choose the one that fits your comfort level and available supplies.
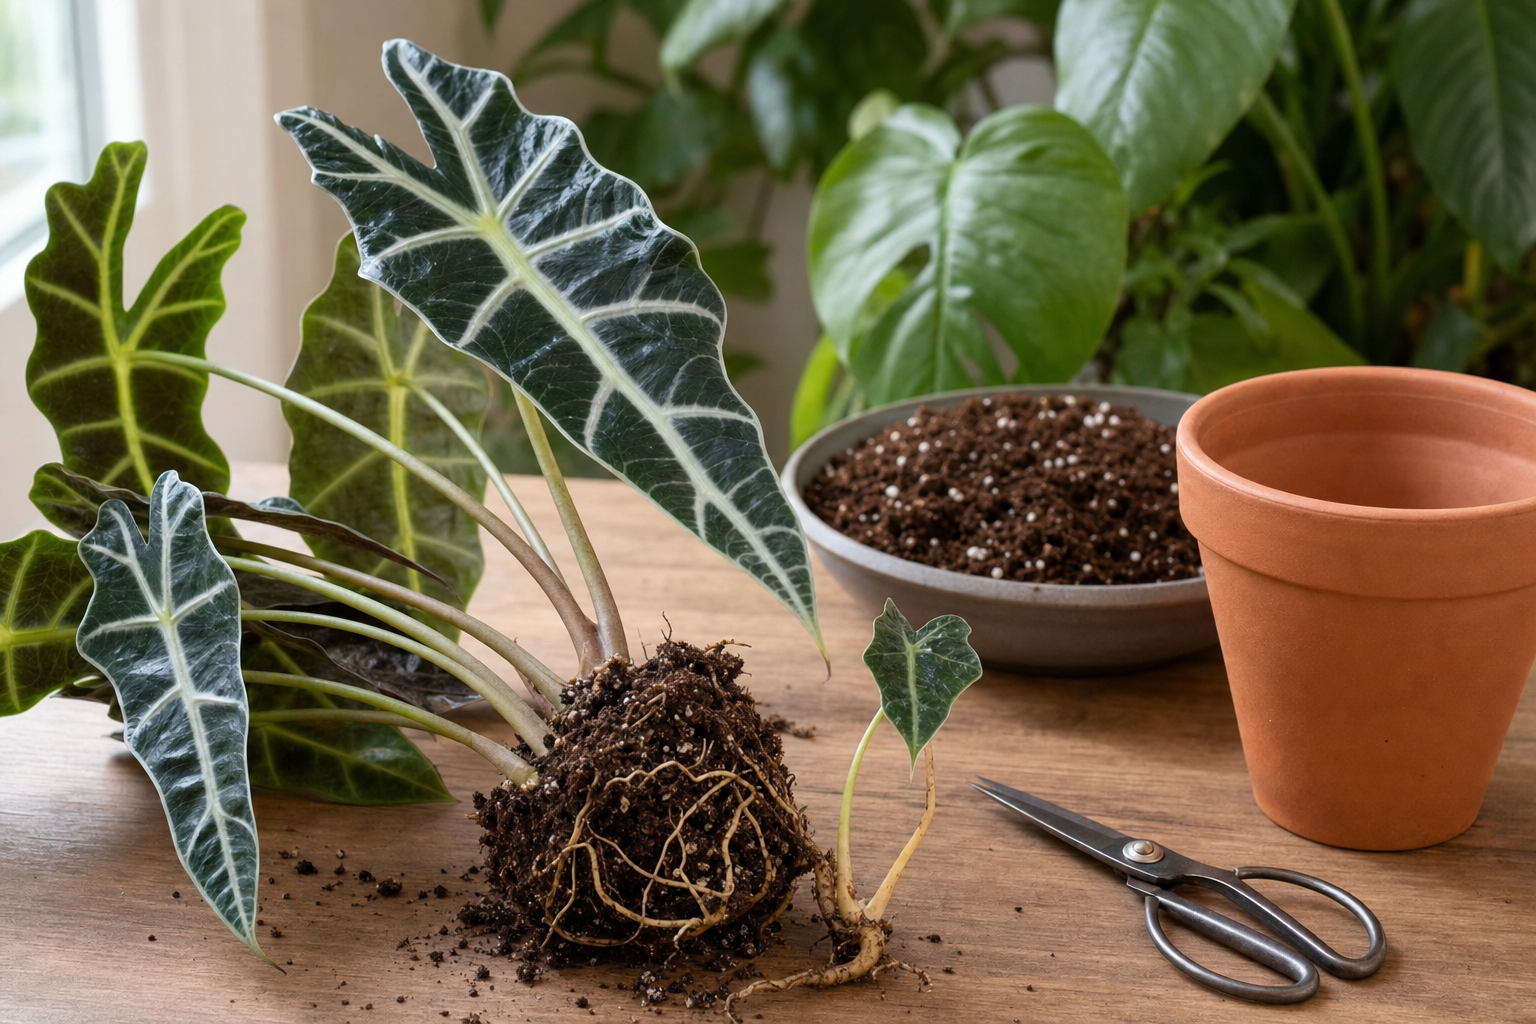
Division (recommended for home growers)
- 1 The best time to divide is during repotting in spring or early summer when the plant is actively growing.
- 2 Remove the parent plant from its pot and gently brush away excess soil from the root ball.
- 3 Look for natural divisions — offsets that have developed their own roots and at least one or two leaves.
- 4 Using clean, sharp scissors or a knife, carefully separate the offset from the parent plant, ensuring the offset has its own root system attached.
- 5 Pot each division in its own small pot (4–6 inches) filled with the recommended well-draining aroid mix.
- 6 Water lightly and place in bright indirect light.
- 7 Keep the soil consistently moist (not soggy) for the first 2–3 weeks as the new plant establishes.
Expected timeline: roots establish in 3–4 weeks, new leaf growth in 6–8 weeks. Success rate: approximately 80–90% with healthy offsets.
Success rate: approximately 80–90% with healthy offsets.
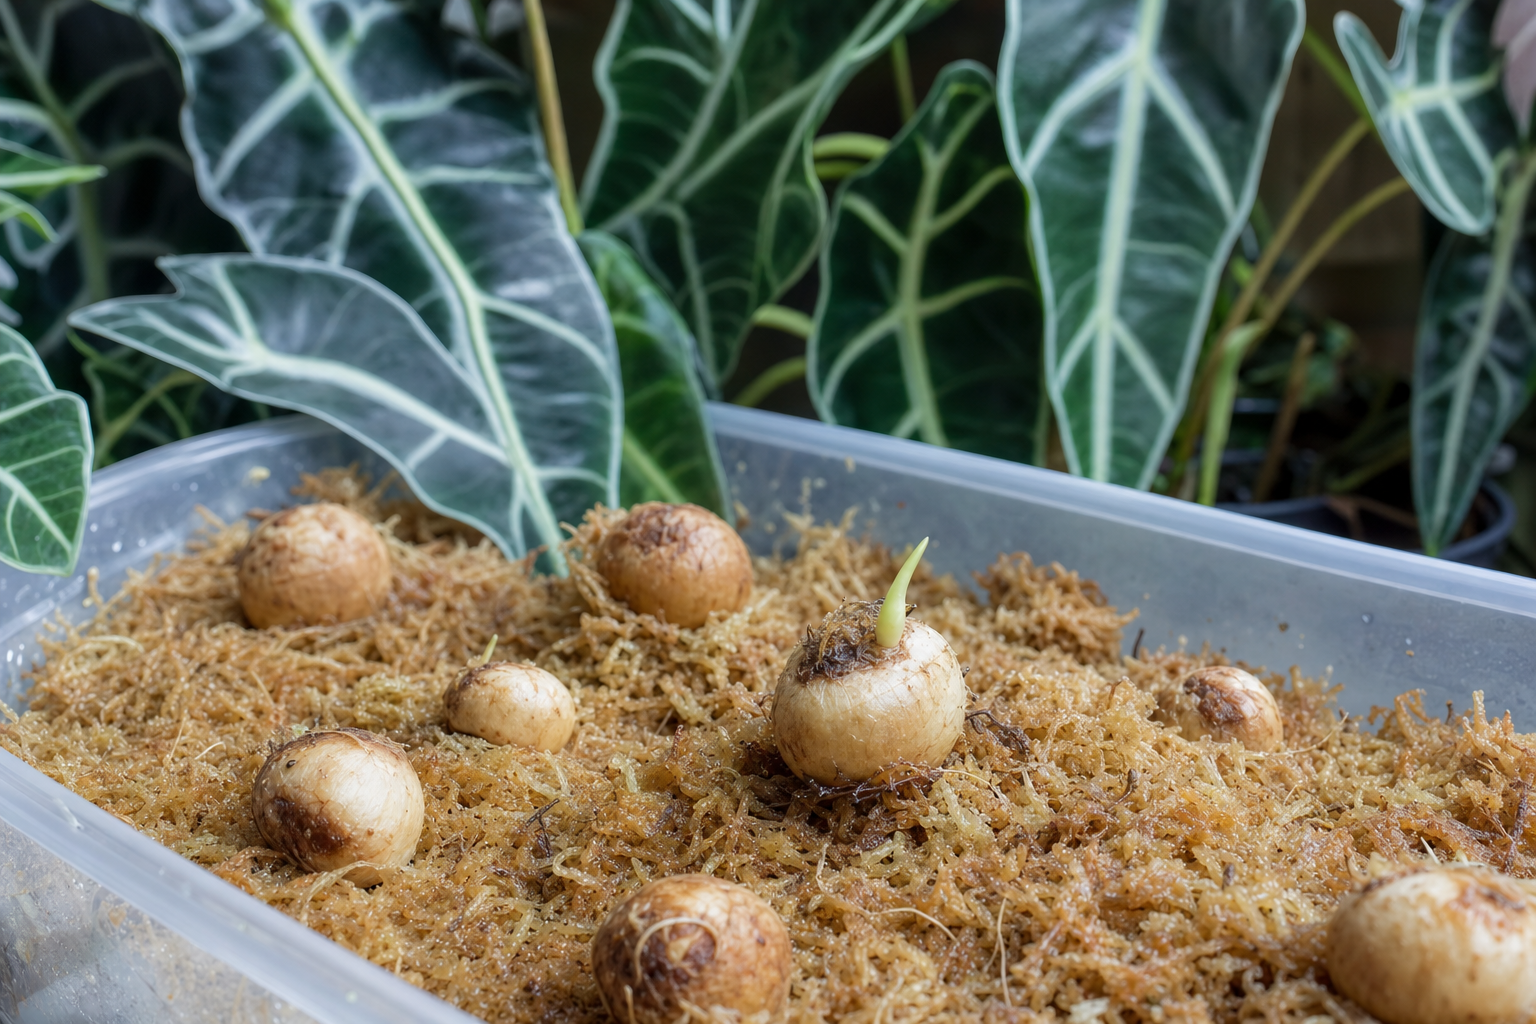
Corm propagation
Alocasia produces small corms (tuber-like structures) that can be harvested and sprouted.
- 1 When repotting, gently separate any small corms from the root mass.
- 2 Place corms in a shallow tray of moist (not soggy) sphagnum moss or aroid mix.
- 3 Cover lightly with more moss.
- 4 Keep in a warm location (70–80°F) with bright indirect light.
- 5 Keep the medium consistently moist.
- 6 Corms typically sprout in 4–8 weeks.
- 7 Once a sprout emerges with its own roots, transplant into a small pot with well-draining soil.
Expected timeline: corms sprout in 4–8 weeks, ready to pot in 8–12 weeks. Success rate: approximately 60–75%.
Success rate: approximately 60–75%.
Troubleshooting Common Issues
Offsets dying after separation
This usually happens if the offset didn't have enough established roots, or if the soil was kept too wet after division. Ensure each offset has its own root system before separating. Keep newly potted divisions in high humidity (a clear plastic bag over the pot helps) and water sparingly until established.
Corms not sprouting
Corms need warmth (70–80°F) and consistent moisture to sprout. If your space is too cool or the medium dried out, they won't grow. Consider using a heat mat set to 75°F. Also ensure the corms are planted right-side up — the pointy end goes up.
New plant wilting after division
Some wilting is normal as the plant adjusts to root loss. Increase humidity around the plant (humidifier or plastic bag dome) and keep the soil consistently moist but not soggy. Most plants recover within 1–2 weeks.
Propagation Tips
- ✓ Always use clean, sterilized tools to prevent infection
- ✓ Cuttings need bright indirect light — never direct sun
- ✓ Change propagation water every 5–7 days to prevent bacteria
- ✓ Be patient — rooting takes 2–6 weeks depending on the method
- ✓ Spring and summer are the best seasons for propagation