
How to Propagate Fiddle Leaf Fig
Fiddle Leaf Fig is one of the easiest houseplants to propagate. Here are three reliable methods — choose the one that fits your comfort level and available supplies.
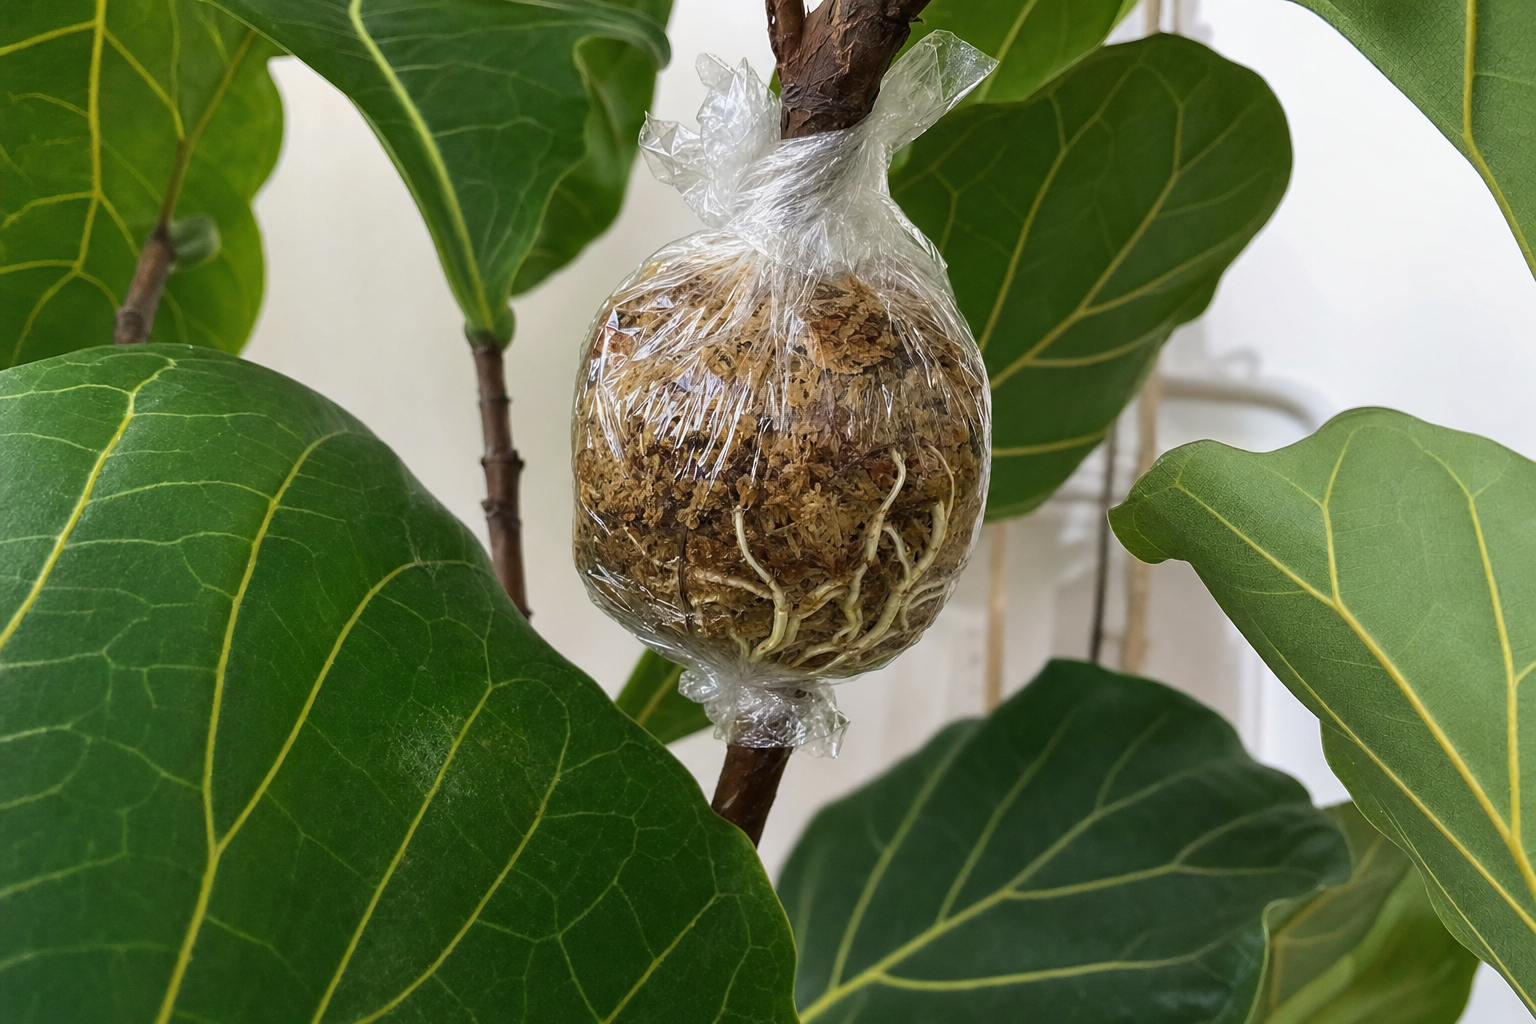
Air layering (most reliable method)
This method produces the highest success rate because the cutting develops roots while still attached to the parent plant, receiving water and nutrients throughout the process. You will need a clean sharp knife, a toothpick, rooting hormone powder, moist sphagnum moss, plastic wrap, and tape or twist ties.
- 1 Select a healthy stem section on the parent plant where you want a new plant to form.
- 2 Make an upward diagonal cut about halfway through the stem, cutting at a 45-degree angle. The upward angle prevents water from pooling in the cut.
- 3 Insert a toothpick or small wooden match into the cut to keep it from closing — the cut must remain open for roots to emerge.
- 4 Apply rooting hormone powder directly to the cut surface and the exposed wood inside.
- 5 Wrap a generous handful of moist (not dripping) sphagnum moss around the cut area, covering it completely.
- 6 Cover the moss with plastic wrap, securing it tightly at both ends with tape or twist ties to create a sealed, humid environment.
- 7 Check the moss every 5–7 days, misting with water if it feels dry.
- 8 Roots will develop inside the moss in 6–10 weeks — you may see them pressing against the plastic.
- 9 Once a good root network has formed, cut the stem below the rooted section and pot it up in fresh well-draining soil.
- 10 The parent plant will continue growing from the portion below the original cut, often producing new branches.
Expected timeline: roots in 6–10 weeks, established plant in 14–16 weeks. Success rate: approximately 80–90%.
Success rate: approximately 80–90%.
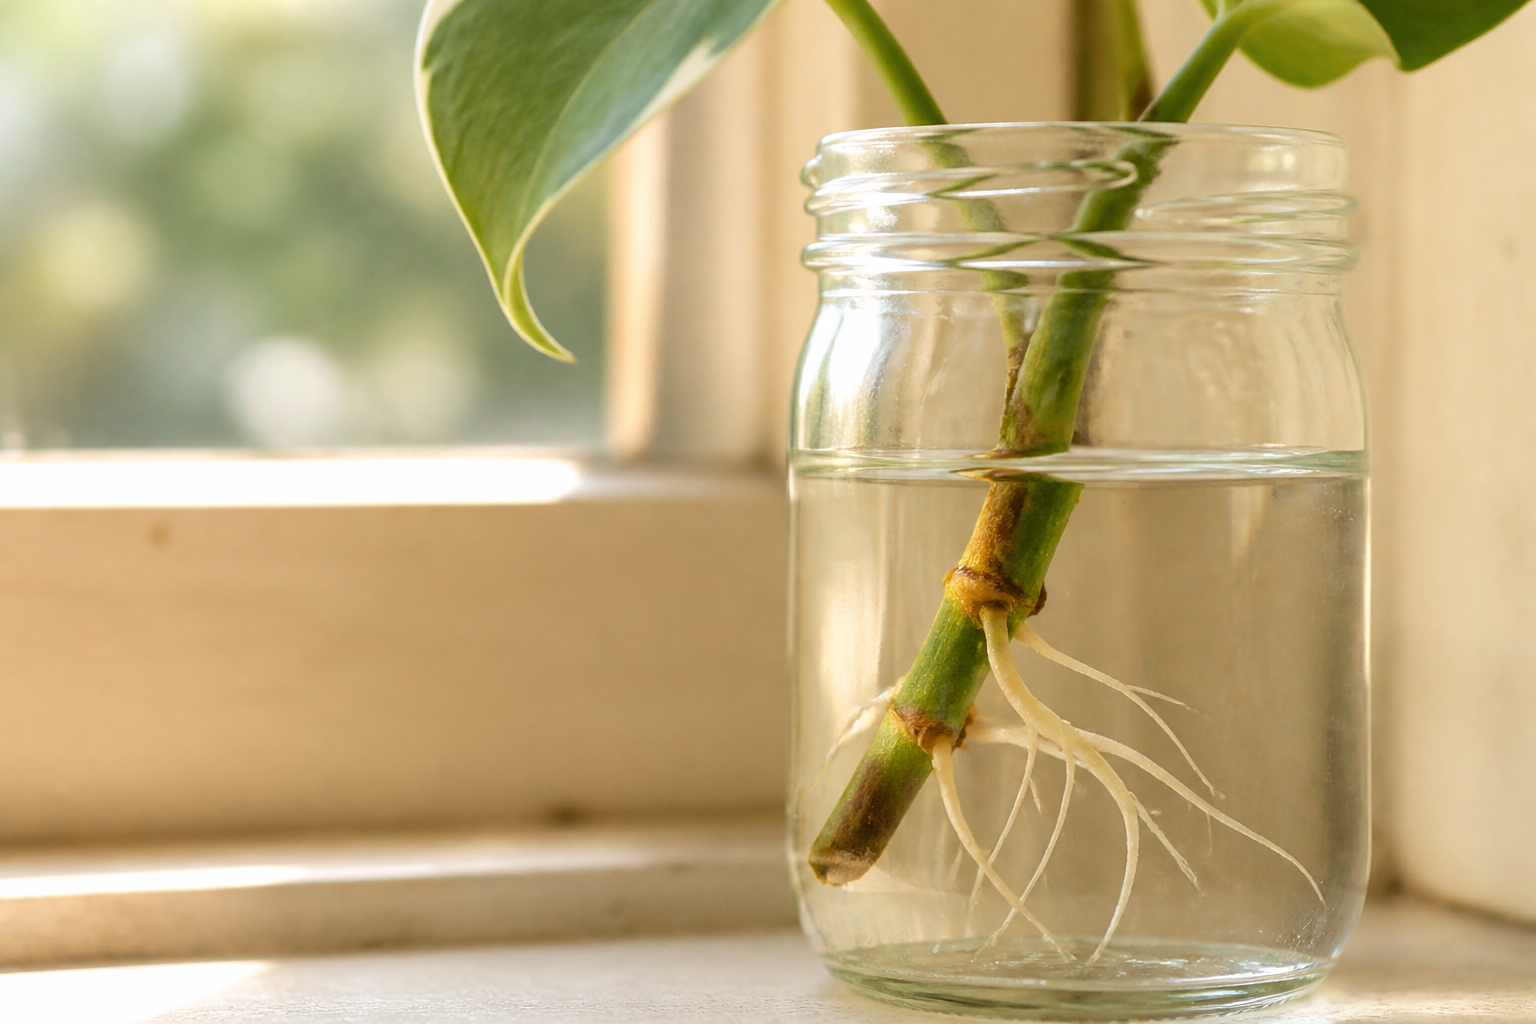
Water propagation (stem tip cuttings)
You will need clean sterilized scissors, a glass jar, room-temperature water, and optionally rooting hormone.
- 1 Select a healthy stem tip with 2–3 leaves and at least 6 inches of stem. The cutting should come from the current season's growth — newer, greenish stems root better than old, woody ones.
- 2 Cut just below a node using sterilized scissors.
- 3 Remove the bottom leaf to expose more stem and create additional surface area for rooting.
- 4 Optionally dip the cut end in rooting hormone before placing in water.
- 5 Place the cutting in a jar of room-temperature water, ensuring the cut end and any exposed nodes are submerged but no leaves touch the water.
- 6 Position in bright indirect light — direct sun will heat the water and promote bacterial growth.
- 7 Change the water every 5–7 days, rinsing the jar each time.
- 8 Roots typically appear in 3–4 weeks. Wait until roots are 2–3 inches long (6–8 weeks total) before transplanting to soil.
- 9 Transplant into well-draining soil and keep consistently moist for the first 2 weeks.
- 10 Expect some leaf drop during the transition — this is normal.
Expected timeline: roots appear in 3–4 weeks, ready to transplant at 6–8 weeks, established plant in 12–16 weeks. Success rate: approximately 60–75%.
Success rate: approximately 60–75%.
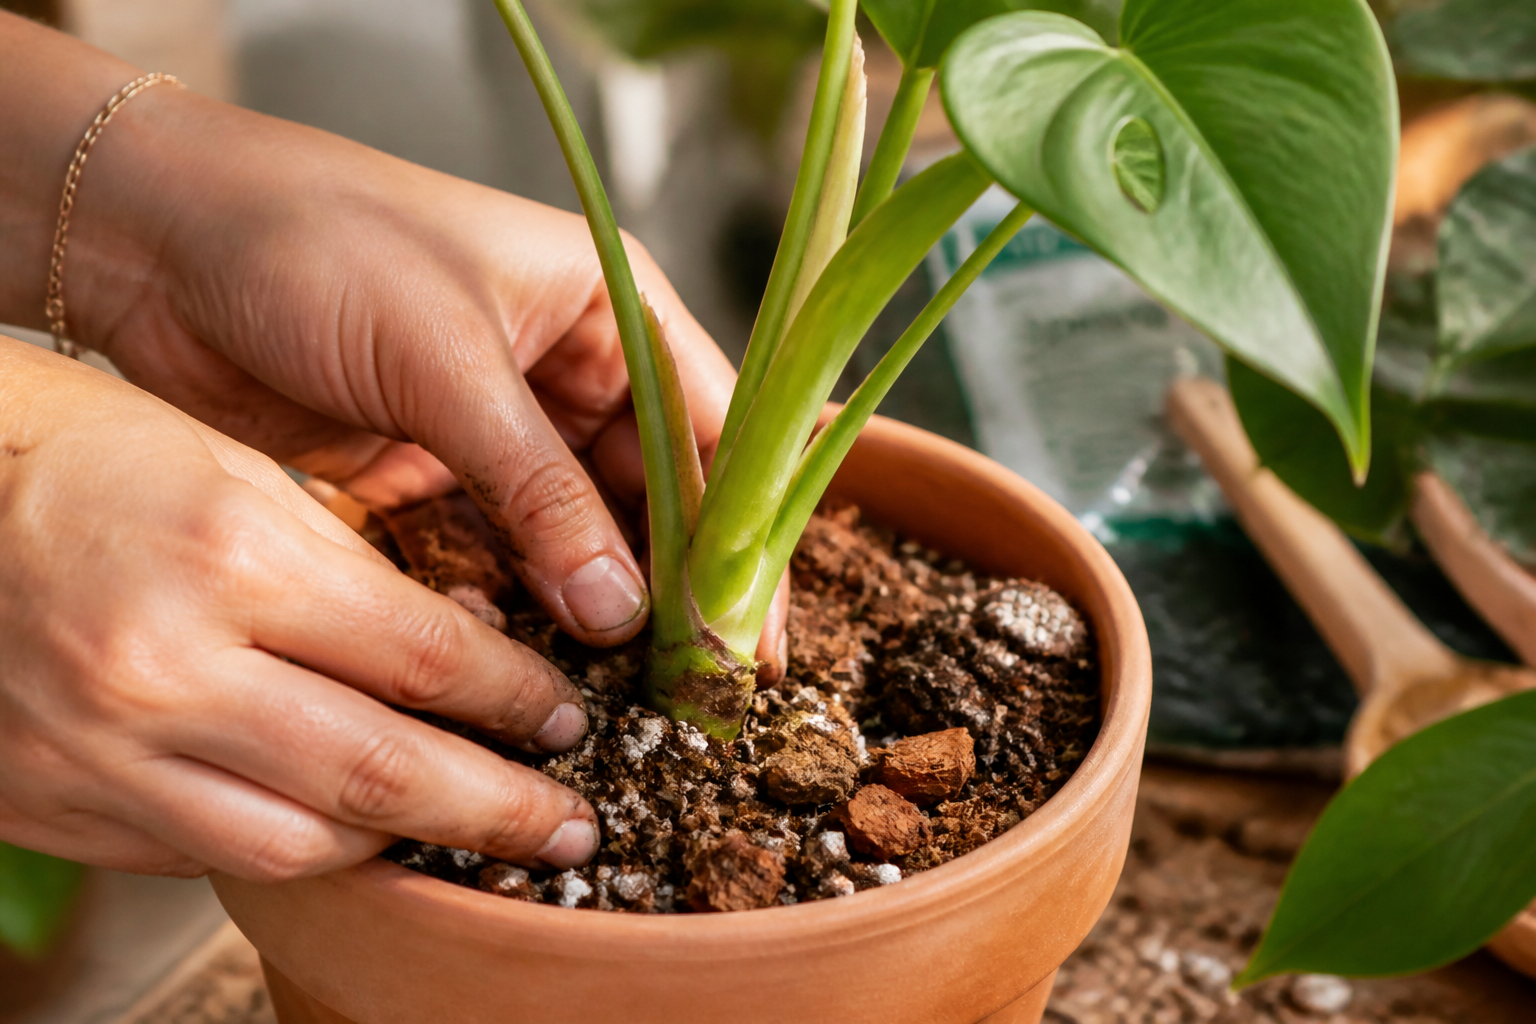
Soil propagation (stem tip cuttings)
You will need clean scissors, rooting hormone (strongly recommended for fiddle leaf figs), a small pot with drainage holes, moist well-draining soil, and a clear plastic bag or propagation dome.
- 1 Take a stem tip cutting as described above with at least one node and 2–3 leaves.
- 2 Dip the cut end in rooting hormone, coating the bottom inch of stem.
- 3 Plant in moist, well-draining soil, burying at least one node about 1 inch deep.
- 4 Water lightly to settle the soil.
- 5 Cover with a clear plastic bag or propagation dome to maintain high humidity — fiddle leaf fig cuttings need 60–80% humidity to root successfully.
- 6 Keep in bright indirect light and maintain temperatures of 70–80°F (21–27°C). A heat mat underneath the pot can dramatically improve success rates.
- 7 Keep soil consistently moist but not soggy.
- 8 New growth appearing at 6–8 weeks indicates successful rooting.
- 9 Gradually remove the humidity cover over 4–5 days once new growth is visible.
Expected timeline: roots form in 4–6 weeks, new growth in 6–8 weeks, established plant in 12–16 weeks. Success rate: approximately 50–65%.
Success rate: approximately 50–65%.
Important note on single-leaf cuttings
Single fiddle leaf fig leaves will develop roots in water, but they almost never produce new stem growth. You need a stem section with at least one node (growth point) to get a viable new plant. A rooted leaf without a node will eventually die after its stored energy is depleted.
Troubleshooting Common Issues
Cutting losing leaves
Some leaf drop is normal during propagation as the cutting redirects energy to root development. If all leaves drop, the cutting is unlikely to survive. Ensure bright indirect light (not direct sun), consistent warmth, and high humidity. Leaves that turn brown from the edges inward are usually too dry — increase humidity.
Black or brown stem at the water line
This indicates rot, the most common cause of failure. Remove the affected cutting immediately. If any stem above the rot is firm and green, recut 1 inch above the rot line and restart in clean water with a drop of hydrogen peroxide. Prevent rot by changing water frequently and keeping the jar out of direct sunlight.
Air layering moss drying out
Dry moss means the cut has closed and no roots will form. Unwrap the plastic and remoisten the moss thoroughly, then reseal tightly. If the cut has healed closed, make a fresh cut and start the air layering process again.
No roots after 6 weeks
Fiddle leaf figs are slow rooters. Ensure warm temperatures (75–80°F is ideal), consistent moisture, and patience. Adding a heat mat can accelerate the process. If the cutting is still firm and green with no signs of rot, it may simply need more time.
Propagation Tips
- ✓ Always use clean, sterilized tools to prevent infection
- ✓ Cuttings need bright indirect light — never direct sun
- ✓ Change propagation water every 5–7 days to prevent bacteria
- ✓ Be patient — rooting takes 2–6 weeks depending on the method
- ✓ Spring and summer are the best seasons for propagation