
How to Propagate Bird's Nest Fern
Bird's Nest Fern is one of the easiest houseplants to propagate. Here are three reliable methods — choose the one that fits your comfort level and available supplies.
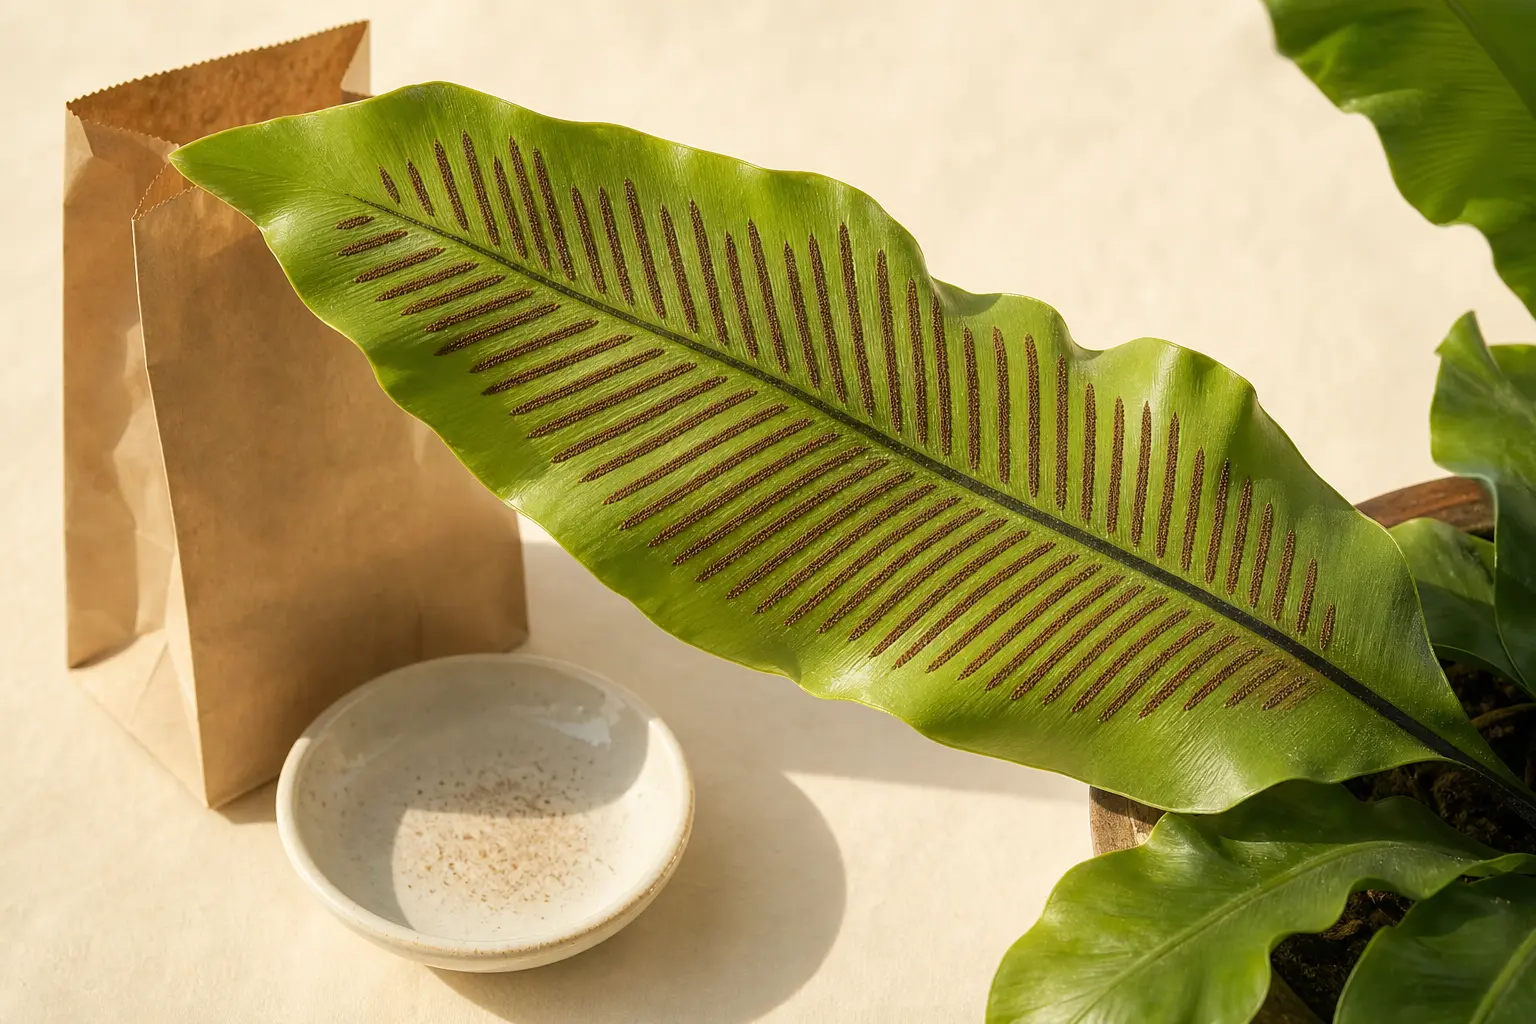
Spore propagation method
You will need spores collected from the underside of mature fronds, sterile potting mix, a clear plastic container with a lid, and patience for 6–18 months.
- 1 Identify spore-bearing fronds — look for brown linear sori (spore clusters) running parallel along the underside of mature fronds.
- 2 Cut a fertile frond and place it in a paper bag for 2–3 days; spores will fall out as fine brown dust.
- 3 Fill a clean container with sterilized peat-perlite mix and moisten thoroughly.
- 4 Sprinkle spores evenly over the surface — do not bury them.
- 5 Cover with a clear lid to maintain 100% humidity and place in indirect light at 70–75°F (21–24°C).
- 6 Mist the surface lightly only if it dries out.
- 7 After 2–3 months, a green moss-like film (the gametophyte stage) will appear.
- 8 After another 4–6 months, tiny ferns will emerge that can be carefully transplanted to small pots once they have 2–3 fronds.
Expected timeline: 6–18 months from spore to small plant. Success rate: 30–50% under ideal conditions, lower for beginners.
Success rate: 30–50% under ideal conditions, lower for beginners.
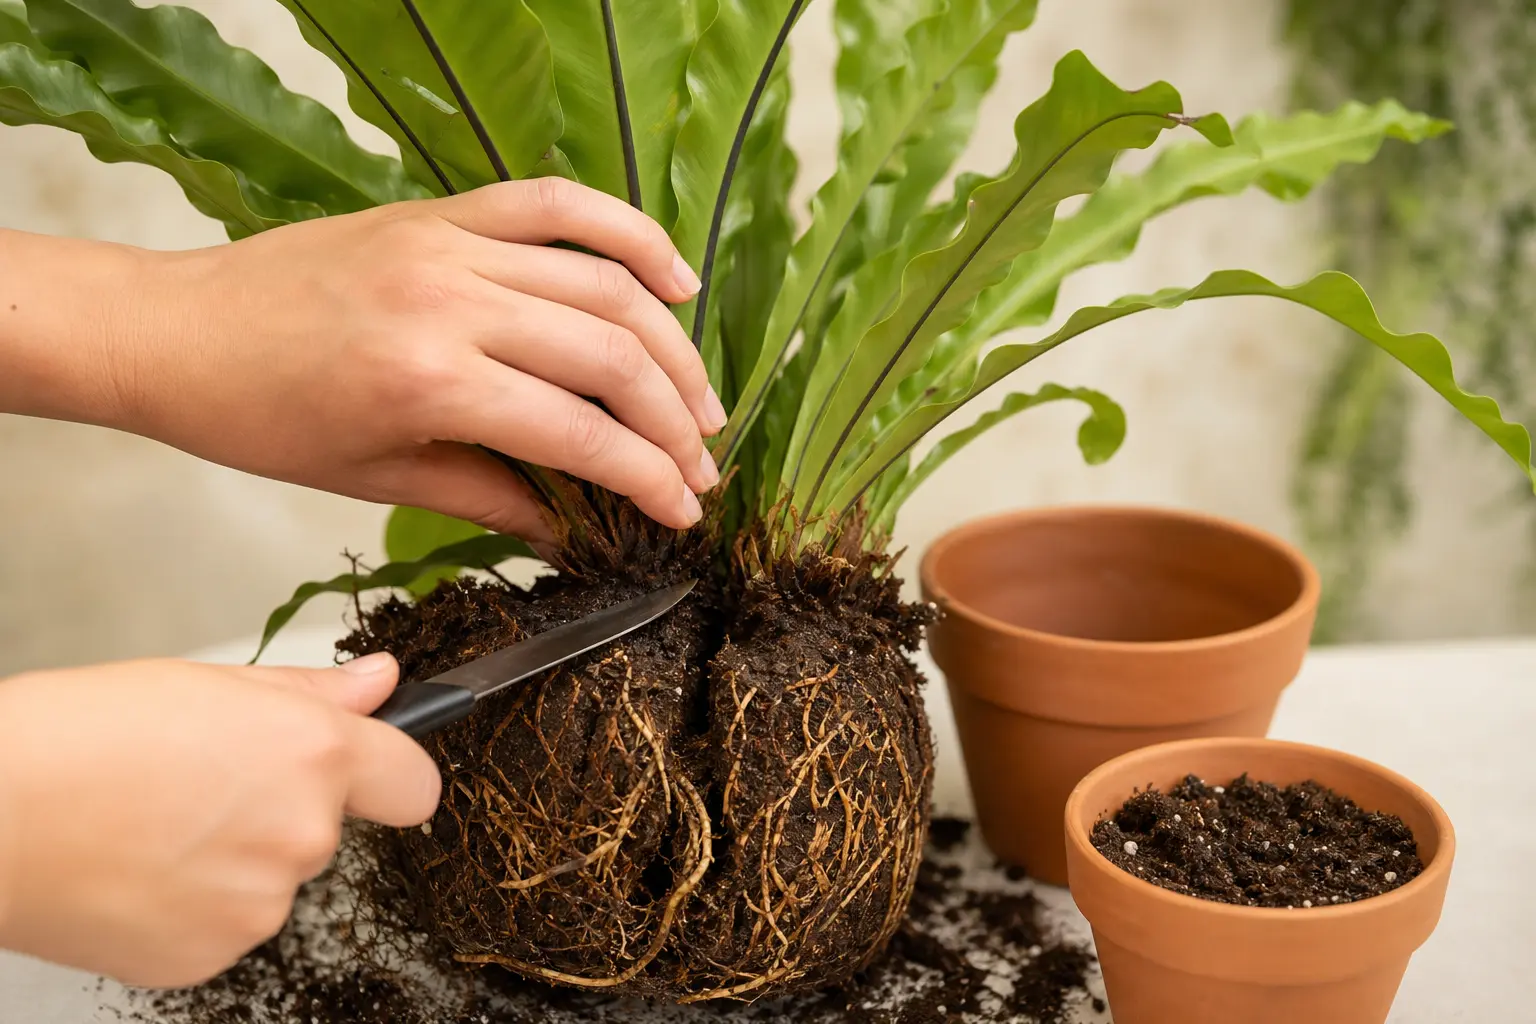
Crown division method
Some mature Bird's Nest Ferns occasionally produce a second smaller crown beside the main rosette. If this happens, division is possible but risky.
- 1 Wait until the side crown has developed its own clear rosette and at least 4–5 fronds.
- 2 Remove the entire plant from the pot in spring.
- 3 Use a clean sharp knife to cut between the two crowns, ensuring each section retains a portion of the root system.
- 4 Pot each crown in its own container with fresh, well-draining fern mix.
- 5 Water lightly and maintain very high humidity (80%+) for 4–6 weeks while the divisions recover.
Expected timeline: divisions establish in 4–8 weeks. Success rate: approximately 50–70%, with notable risk of losing one or both divisions to crown rot.
Success rate: approximately 50–70%, with notable risk of losing one or both divisions to crown rot.
Troubleshooting Common Issues
Spores never germinate
The growing surface dried out or temperatures were too cool. Maintain 100% humidity with a sealed cover and keep temperatures consistently at 70–75°F. Use sterilized mix to prevent algae and mold from outcompeting the spores.
Gametophyte stage develops mold
Excessive moisture and poor airflow. Briefly open the lid for 30 minutes daily to allow fresh air, and reduce misting. A small amount of cinnamon dusted on the surface can help control fungal issues.
Divided crowns yellow and die
The cut section did not retain enough roots, or the crown was buried during repotting. Always plant the crown so it sits above the soil line, and use a humidity tent for the first month to reduce transpiration stress while roots regenerate.
Propagation Tips
- ✓ Always use clean, sterilized tools to prevent infection
- ✓ Cuttings need bright indirect light — never direct sun
- ✓ Change propagation water every 5–7 days to prevent bacteria
- ✓ Be patient — rooting takes 2–6 weeks depending on the method
- ✓ Spring and summer are the best seasons for propagation