

Aloe Vera
Aloe barbadensis miller
Also known as: Aloe, Burn Plant, Lily of the Desert, Elephant's Gall
Last updated: Sep 10, 2026
Bright indirect light; some direct sun tolerated
When soil is completely dry; every 2–3 weeks
30–50%
55–80°F (13–27°C)
Cactus/succulent mix or well-draining sandy soil
Diluted balanced fertilizer once in spring, once in summer
Beginner friendly
Toxic to pets
Toxic to Pets
Topical gel is safe and medicinal for humans, but ingestion of the latex (yellow layer between gel and rind) can cause digestive upset. Mildly toxic to cats and dogs if ingested — may cause vomiting and lethargy.
Source: ASPCA Toxic Plant List
Seasonal Care Calendar
| Season | Watering | Fertilizer | Notes |
|---|---|---|---|
| Spring | Every 2–3 weeks | Apply diluted balanced fertilizer | Begin regular watering as growth resumes. Repot or separate pups if needed. Move outdoors gradually if desired. |
| Summer | Every 2 weeks | Apply diluted balanced fertilizer once mid-summer | Active growth period. Ensure good airflow. Monitor for mealybugs. Avoid afternoon sun scorch. |
| Fall | Every 3 weeks | None | Growth slows. Reduce watering frequency. Stop fertilizing. Bring outdoor plants inside before frost. |
| Winter | Every 3–4 weeks | None | Dormant period. Water very sparingly. Keep away from cold drafts and heating vents. Ensure soil dries completely between waterings. |
Detailed Care Guide
Everything you need to know to keep your Aloe Vera thriving.
Light Requirements
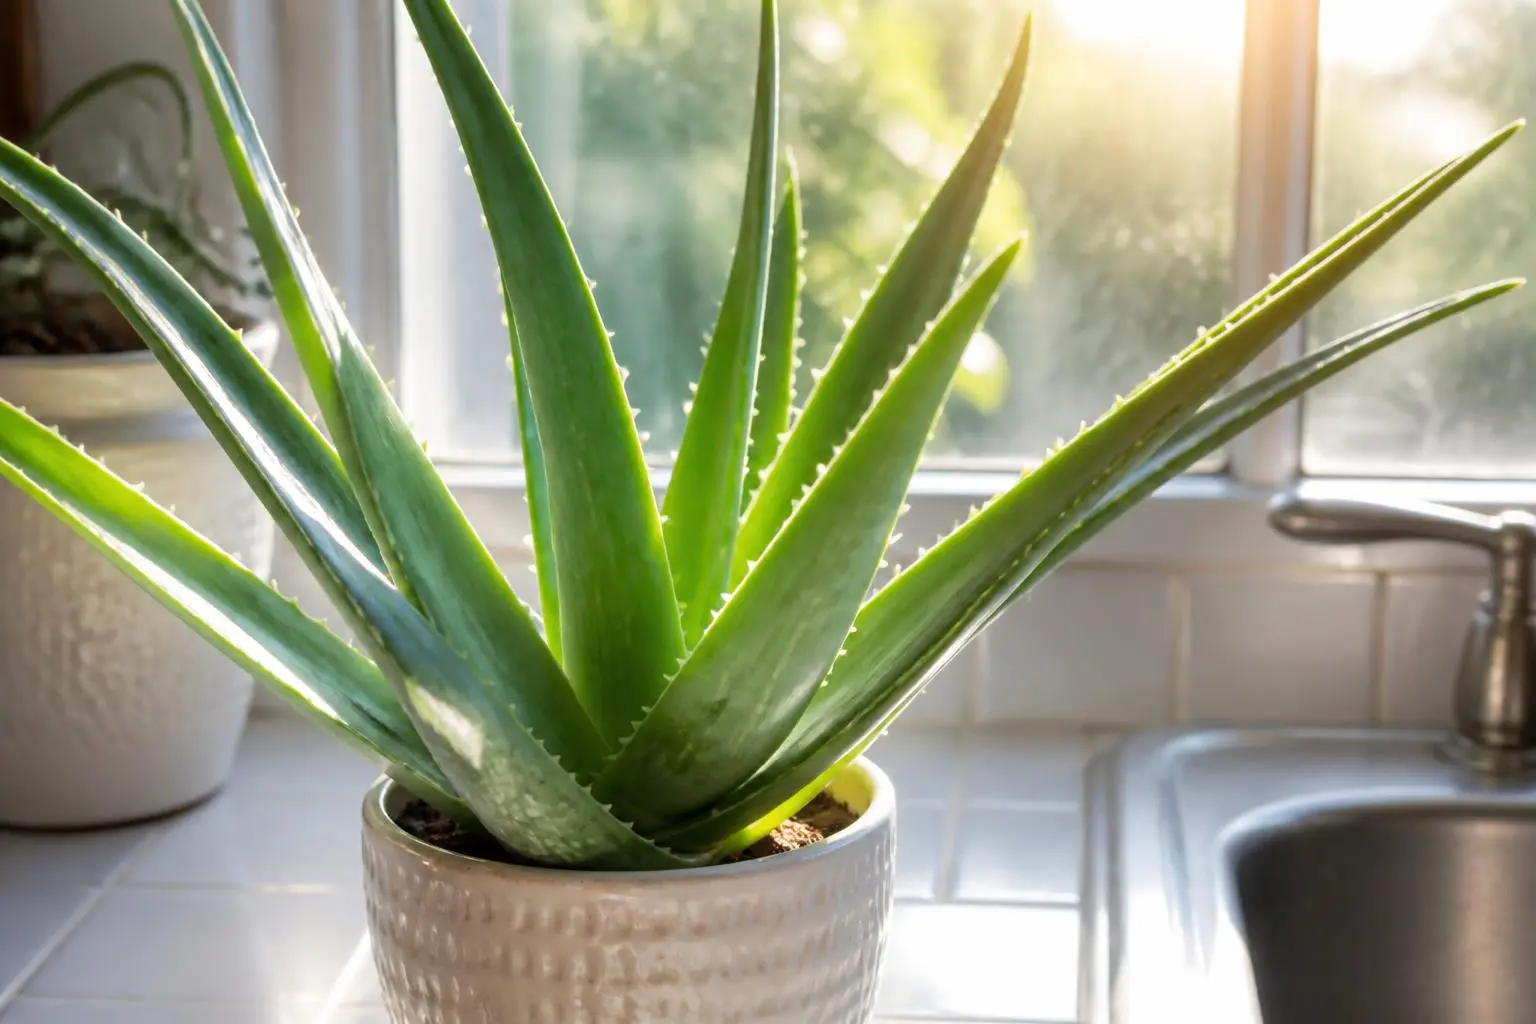
Aloe vera thrives in bright, indirect light and is one of the few succulents that tolerates — and even appreciates — a few hours of direct sunlight each day. An east- or south-facing windowsill is ideal, where the plant receives gentle morning sun and bright ambient light for the rest of the day. Direct afternoon sun in hot climates can scorch the leaves, causing them to turn reddish-brown or develop dry, bleached patches.
If your aloe is stretching upward with pale, elongated leaves, it is etiolating — a clear sign it needs more light. A healthy aloe should have compact, plump leaves that fan out symmetrically from the center of the rosette. Rotate the pot a quarter turn every week or two to ensure even growth on all sides.
Aloe vera can adapt to medium-light conditions for a while, but growth will slow significantly and the plant may lose its compact shape over time. If you lack a bright window, a full-spectrum grow light positioned 12–18 inches above the plant for 10–12 hours a day is an effective alternative. Avoid placing aloe in deep shade — it will slowly decline and become susceptible to rot and pests.
Watering
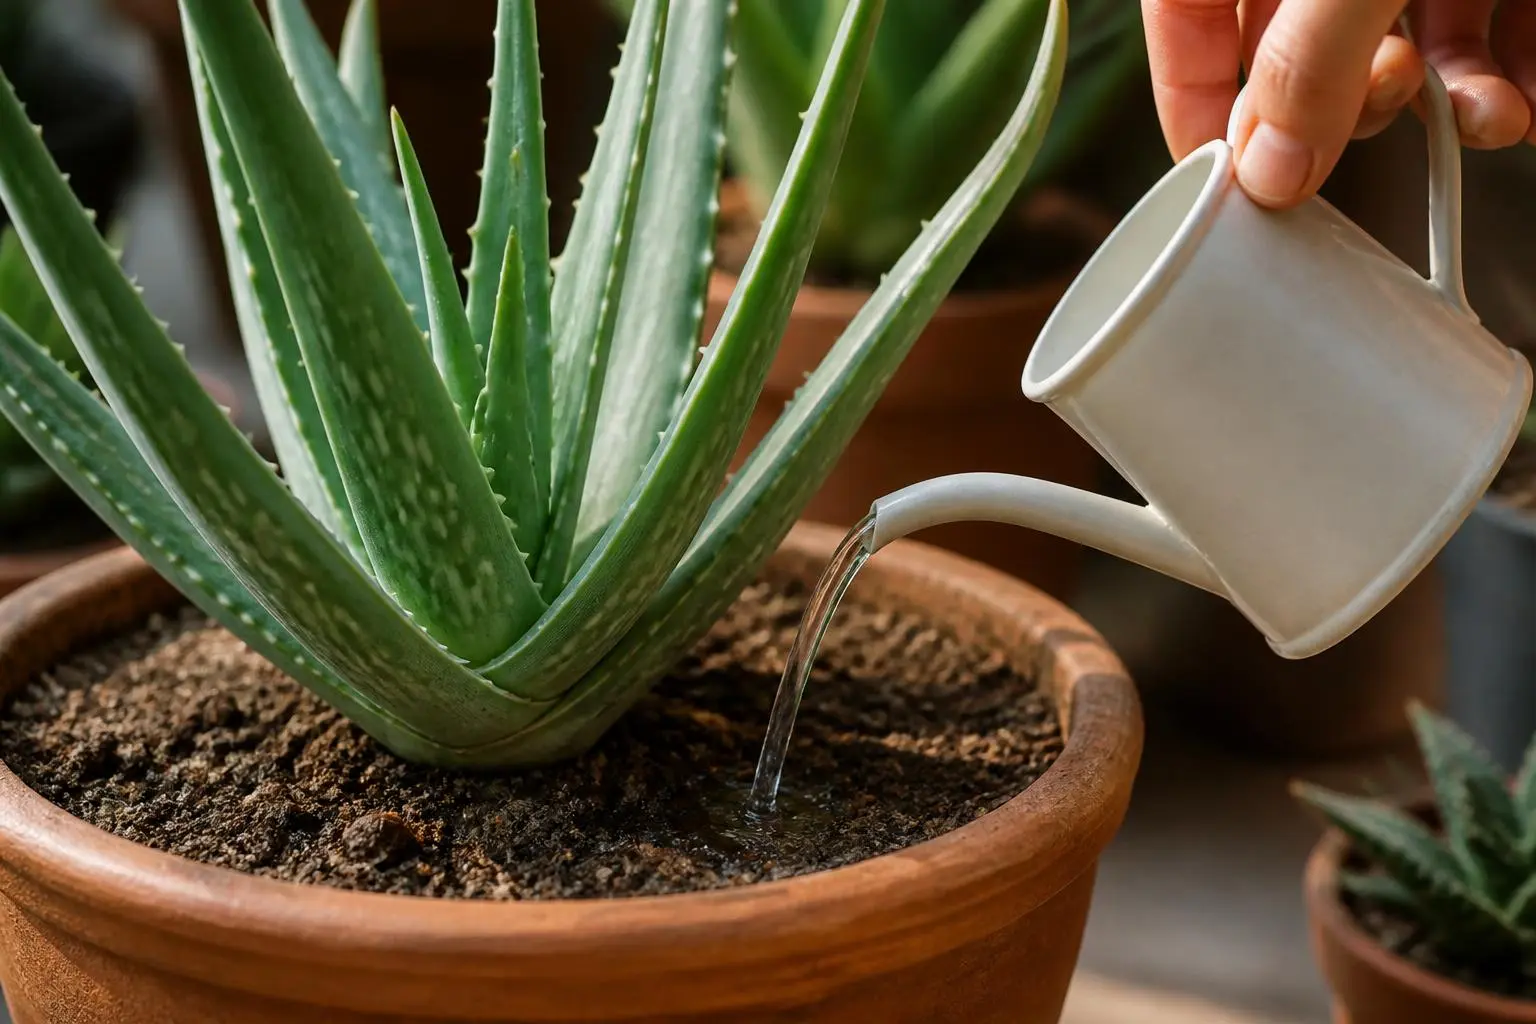
Overwatering is the number one killer of aloe vera — by a wide margin. As a desert succulent, aloe stores water in its thick fleshy leaves and can go weeks without a drink. The golden rule: wait until the soil is completely dry before watering, and then wait one more day. In practice, this means watering every 2–3 weeks in spring and summer, and as infrequently as every 3–4 weeks in fall and winter.
Always check the soil with your finger or a moisture meter before watering. If any moisture remains, walk away. When you do water, give it a thorough soak until water drains freely from the bottom — then empty the saucer. Never let aloe sit in standing water. Use room-temperature water; cold water can shock the roots.
Signs of overwatering: leaves turning soft, translucent, and yellow or brown at the base; a mushy stem; soil that stays wet for days; and an unpleasant smell from the pot (root rot). Signs of underwatering: leaves becoming thin, curled inward, and slightly wrinkled — the plant is using its stored reserves. A slightly underwatered aloe recovers quickly with a good soak; an overwatered one may not recover at all.
Humidity
Aloe vera is a desert native and prefers dry air — humidity between 30–50% is ideal. Average household humidity in most homes is perfectly fine. In fact, high humidity is more of a problem than low humidity for this plant, as excess moisture in the air combined with wet soil creates the perfect conditions for fungal infections and root rot.
If you live in a humid climate or run a humidifier near your plant collection, make sure your aloe has excellent airflow around it. A small fan on low speed nearby can help, as can spacing plants apart rather than crowding them together. Avoid misting aloe vera — the water sits in the rosette and between leaves, promoting rot rather than helping the plant.
In dry winter homes with forced-air heating, your aloe will actually be quite content. The low humidity that troubles tropical houseplants like ferns and calatheas is exactly what aloe prefers. The only adjustment you may need in very dry conditions is to water slightly more frequently, since the soil will dry out faster.
Temperature
Aloe vera prefers temperatures between 55–80°F (13–27°C), which aligns perfectly with typical indoor conditions. It can tolerate brief exposure to temperatures as low as 40°F (4°C) but will suffer damage if left in prolonged cold — leaves may become discolored, soft, and eventually turn to mush.
Avoid placing your aloe near cold drafts from air conditioning vents, leaky windows in winter, or exterior doors that open frequently. Equally important is keeping the plant away from direct heat sources like radiators, heating vents, and fireplaces, which can dry out the leaves and stress the plant.
In USDA zones 9–11, aloe vera can be grown outdoors year-round. In colder zones, it makes an excellent outdoor patio plant from late spring through early fall — just bring it inside before the first frost. When transitioning between indoor and outdoor environments, do it gradually over 7–10 days to acclimate the plant and prevent sunburn or shock.
Soil
Aloe vera demands fast-draining soil — this is non-negotiable. Standard potting soil holds too much moisture and will almost certainly lead to root rot. Use a commercial cactus and succulent potting mix, or make your own by combining 2 parts standard potting soil with 1 part coarse sand and 1 part perlite or pumice. The goal is a gritty, well-aerated mix that water flows through quickly.
Adding a handful of horticultural charcoal to the mix helps absorb excess moisture and prevents bacterial growth. Some growers add small gravel or turface to further improve drainage. Avoid using fine play sand — it compacts and actually reduces drainage. Coarse builder's sand or horticultural sand is the right choice.
The pH should be slightly acidic to neutral (6.0–7.0). A simple drainage test: water your potted aloe and time how long it takes to flow from the drainage holes. If water runs through within 10–15 seconds, your soil drains well. If it pools on the surface for more than 30 seconds before soaking in, your mix is too dense — add more perlite or pumice.
Fertilizer
Aloe vera is a light feeder and actually grows better with minimal fertilization than with too much. Over-fertilizing causes salt buildup in the soil, which appears as white crust on the surface and can burn the leaf tips, turning them brown and crispy. In the wild, aloe grows in nutrient-poor sandy soils, so it is adapted to thrive with very little.
Feed with a balanced liquid fertilizer (NPK 10-10-10) diluted to half strength — or even quarter strength — applied just twice a year: once in spring and once in mid-summer. Water the plant lightly before fertilizing to avoid shocking the roots with concentrated nutrients.
If you prefer organic options, a diluted worm castings tea applied in spring works well. Slow-release succulent fertilizer granules mixed into the soil at the start of the growing season are another low-effort option. Do not fertilize at all during fall and winter when the plant is in its resting period. If your aloe has been recently repotted into fresh soil, skip fertilizing for 2–3 months — the new soil contains sufficient nutrients.
Repotting
Aloe vera typically needs repotting every 2–3 years, or when it has outgrown its container or produced so many pups that the pot is bursting. The best time to repot is in spring or early summer when the plant is entering its active growing phase and can recover quickly from root disturbance.
Choose a pot only 1–2 inches larger in diameter than the current one — aloes prefer being slightly root-bound, and too much excess soil stays wet and invites rot. Terracotta pots are ideal because they breathe and allow the soil to dry out faster than plastic or glazed ceramic. Always use a pot with drainage holes — this is critical for succulents.
To repot: water the plant a day or two beforehand to make removal easier. Gently slide it out, shaking off old soil from the roots. Trim any dead, black, or mushy roots with sterilized scissors. If separating pups, carefully tease them apart from the mother plant, ensuring each pup has some roots of its own. Place the plant in the new pot at the same depth it was growing before — do not bury the stem. Fill in with fresh cactus mix, wait 3–5 days before watering to let any damaged roots heal, then water normally.
Harvesting Gel
One of the best things about growing aloe vera is having fresh, medicinal gel on hand for burns, cuts, and skin care. Harvesting is simple but should be done carefully to keep the plant healthy and to avoid the bitter latex layer.
Start by selecting a thick, mature outer leaf — never harvest from the center of the rosette, as those are the newest growth leaves the plant needs. Use a clean, sharp knife to cut the leaf as close to the base as possible. A clean cut heals faster and reduces the risk of infection.
Once cut, stand the leaf upright in a glass for 10–15 minutes to let the yellow latex drain out. The latex is the bitter, yellowish sap between the outer rind and the clear inner gel — it contains aloin, a compound that acts as a laxative and can cause cramping and digestive upset if ingested. You do not want it in your gel.
After draining, use a knife to carefully slice away the rind on one flat side of the leaf, then scoop out the clear gel with a spoon. The gel can be applied directly to the skin for burns, minor cuts, insect bites, and sunburn. For storage, keep the gel in an airtight container in the refrigerator for up to a week. Do not harvest more than one-third of the plant's leaves at a time — it needs its foliage to photosynthesize and grow.
Our Experience
I killed my first aloe by watering it on a schedule like my other houseplants. Now I keep a wooden chopstick next to the pot — I stick it all the way down, and if any soil clings to it, I wait. If it comes out clean and dry, it's time to water. This simple test has saved every aloe since.
— Grown indoors in USDA Zone 7a, south-facing kitchen windowsill, year-round
When I separate pups, I always let the cut end dry on the counter for a full 48 hours before potting them up. I used to plant them right away and lost several to rot. The callus makes all the difference — since I started waiting, I haven't lost a single pup.
— Grown indoors, propagation during spring repotting
My aloe was perpetually soggy until I switched from a glazed ceramic pot to an unglazed terracotta one. The terracotta wicks moisture away from the soil, and suddenly my aloe went from yellowing and soft to firm and green within a month. I also added a layer of gravel at the bottom for extra drainage insurance.
— Grown indoors in a humid apartment, switched to terracotta in spring
 Lace
Lace  Standard
  Tiger
Tiger Compare Varieties
Explore different cultivars side-by-side and find the best match for your space.
Browse all varieties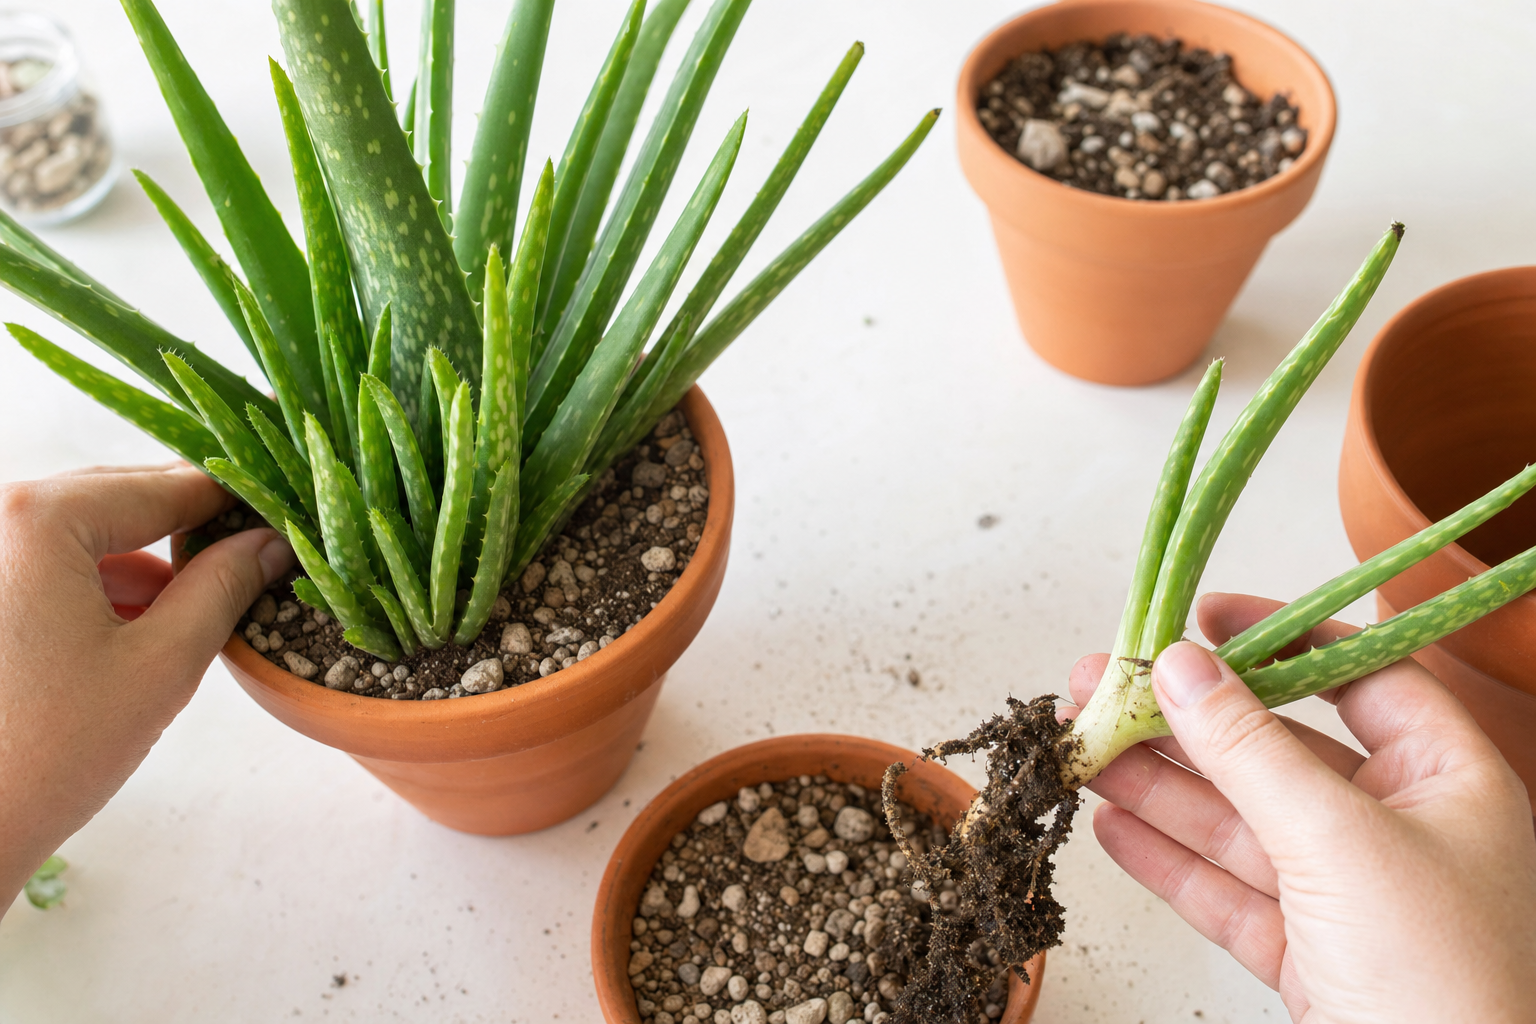
Propagation Guide
Step-by-step instructions for multiplying your plant collection.
Learn how to propagateFrequently Asked Questions
How often should I water my aloe vera?
Why is my aloe vera turning brown?
How do I harvest aloe vera gel?
What are the pups growing around my aloe, and what should I do with them?
Does aloe vera need a lot of light?
Is aloe vera toxic to cats and dogs?
Can I grow aloe vera indoors?
How do I repot my aloe vera?
Common Problems
Why Are My Plant Leaves Turning Yellow?
Yellowing leaves are one of the most common houseplant problems. The good news is that most causes are easy to identify and fix once you know what to look for.
Read diagnosis guideHow to Fix an Overwatered Plant
Overwatering kills more houseplants than any other cause. The tricky part? The symptoms — yellowing, wilting, drooping — look just like underwatering. Here's how to tell the difference and fix it.
Read diagnosis guideReferences
- [1] Royal Horticultural Society. Aloe barbadensis
- [2] ASPCA. Aloe Vera Toxicity
- [3] University of Wisconsin-Madison Extension. Growing Aloe Vera Indoors
- [4] National Center for Complementary and Integrative Health. Aloe Vera
Similar Plants

Snake Plant
Dracaena trifasciata

ZZ Plant
Zamioculcas zamiifolia

Peace Lily
Spathiphyllum wallisii